Pokemon Reborn Wikia
Advertisement
TangrowthPULSEFront
Spoiler warning!
This article contains plot details about events that occur later in the game.


Rhodochrine Jungle
""
Rhodocrine alt alt
Rhodochrine Jungle
Totem Area
Rhodochrine Totem Area
Map description
[[|Glitch City]] - Reborn Gym #{{{gymno}}}
[[File:{{{leadersprite}}}|{{{leader}}}|144px|link={{{leader}}}]]
[[{{{leader}}}|{{{leader}}}]]
No specialty type [[File:{{{badge}}} Badge.png|70px|{{{badge}}} Badge|link=Badge#{{{badge}}} Badge]]
[[Badge#{{{badge}}} Badge|{{{badge}}} Badge]]
[[| League]]
[[File:{{{elite1sprite}}}|64px|{{{elite1}}}|link={{{elite1}}}]]
Elite Four
[[{{{elite1}}}|{{{elite1}}}]]
[[File:{{{elite2sprite}}}|64px|{{{elite2}}}|link={{{elite2}}}]]
Elite Four
[[{{{elite2}}}|{{{elite2}}}]]
[[File:{{{elite3sprite}}}|64px|{{{elite3}}}|link={{{elite3}}}]]
Elite Four
[[{{{elite3}}}|{{{elite3}}}]]
[[File:{{{elite4sprite}}}|64px|{{{elite4}}}|link={{{elite4}}}]]
Elite Four
[[{{{elite4}}}|{{{elite4}}}]]
[[File:{{{championsprite}}}|{{{champion}}}|link={{{champion}}}]]
Champion [[{{{champion}}}|{{{champion}}}]]
Connecting locations
Rhodochrine Jungle
Beryl Ward
 
The Underroot
 
Map
Opal WardGrand HallLower Peridot WardPeridot WardMosswater IndustrialBlacksteam FactoryObsidia WardSouth Obsidia WardObsidia SlumsCoral WardOnyx WardYureyu HQObsidia Department StoreJasper WardMalchous Forest ParkBeryl WardRhodochrine JungleAbandoned Power PlantCitrine MountainBeryl CaveNorth Obsidia WardLapis WardGrand StairwayDr. Connal's Orphanage7th Street7th StreetRhodocrine Jungle Map
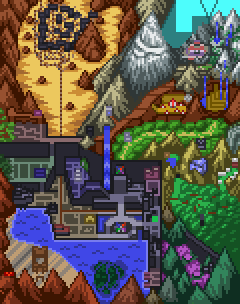
Interactive Map Location of Rhodochrine Jungle in Reborn.

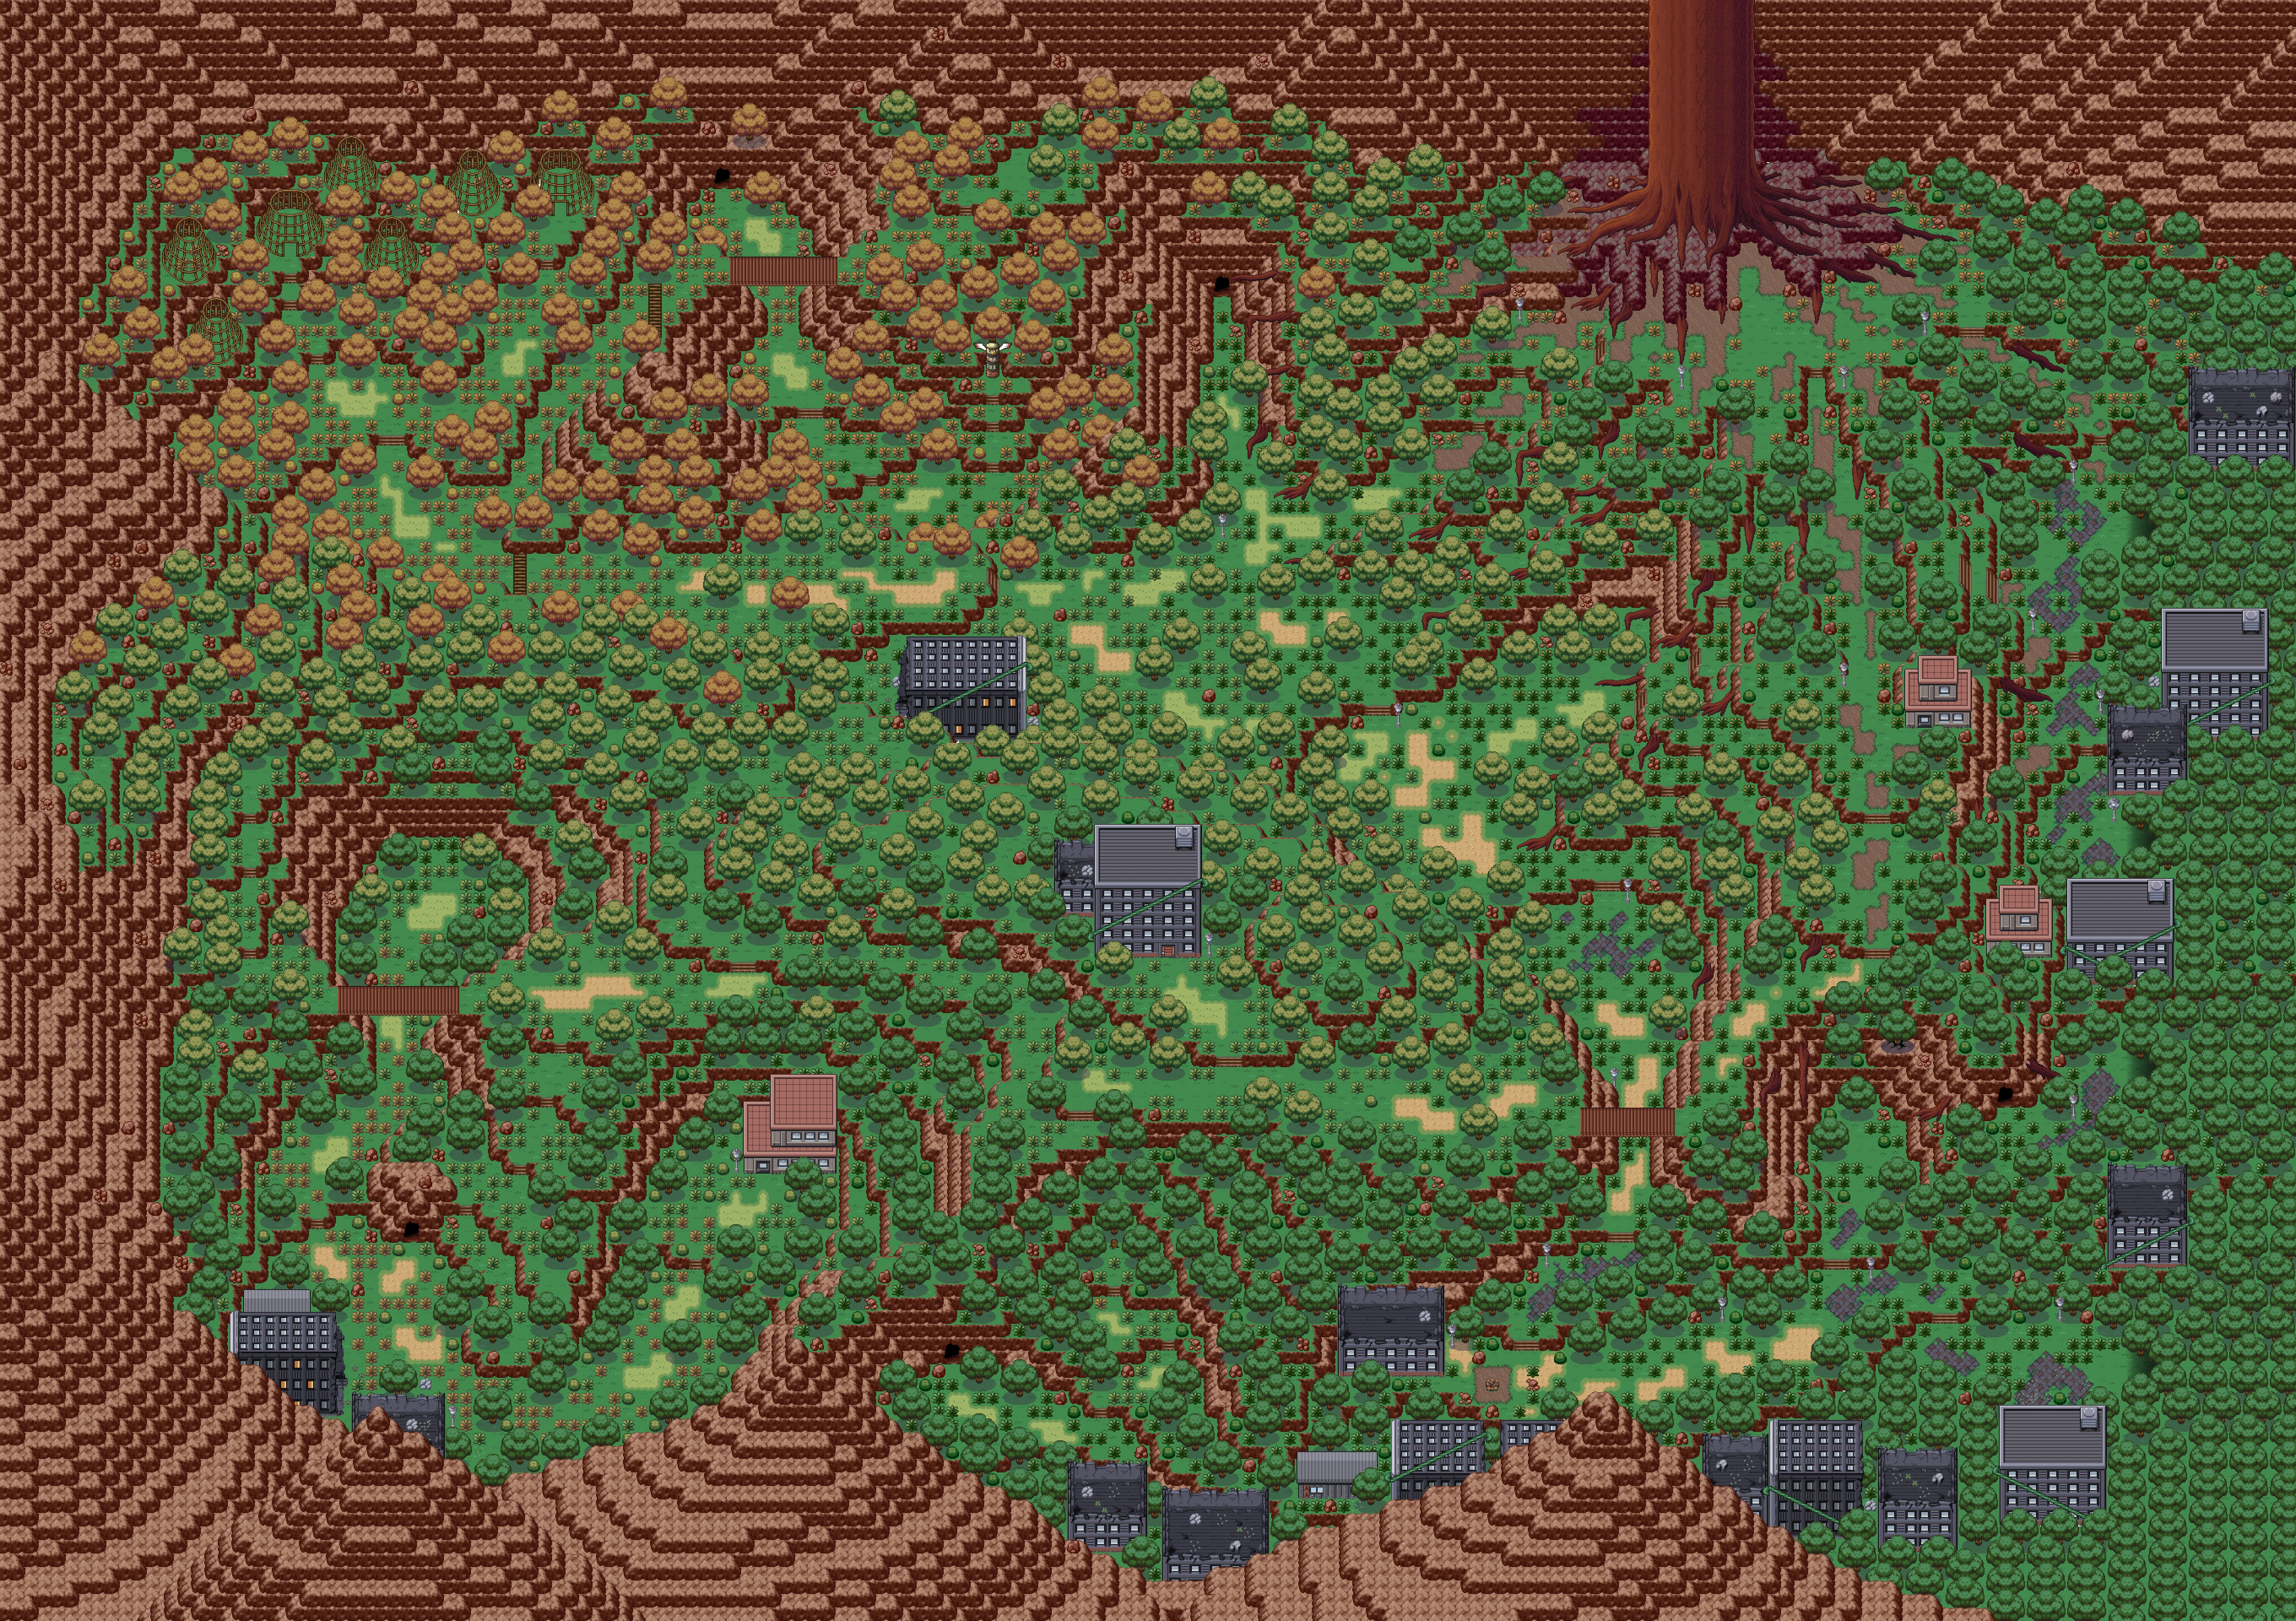
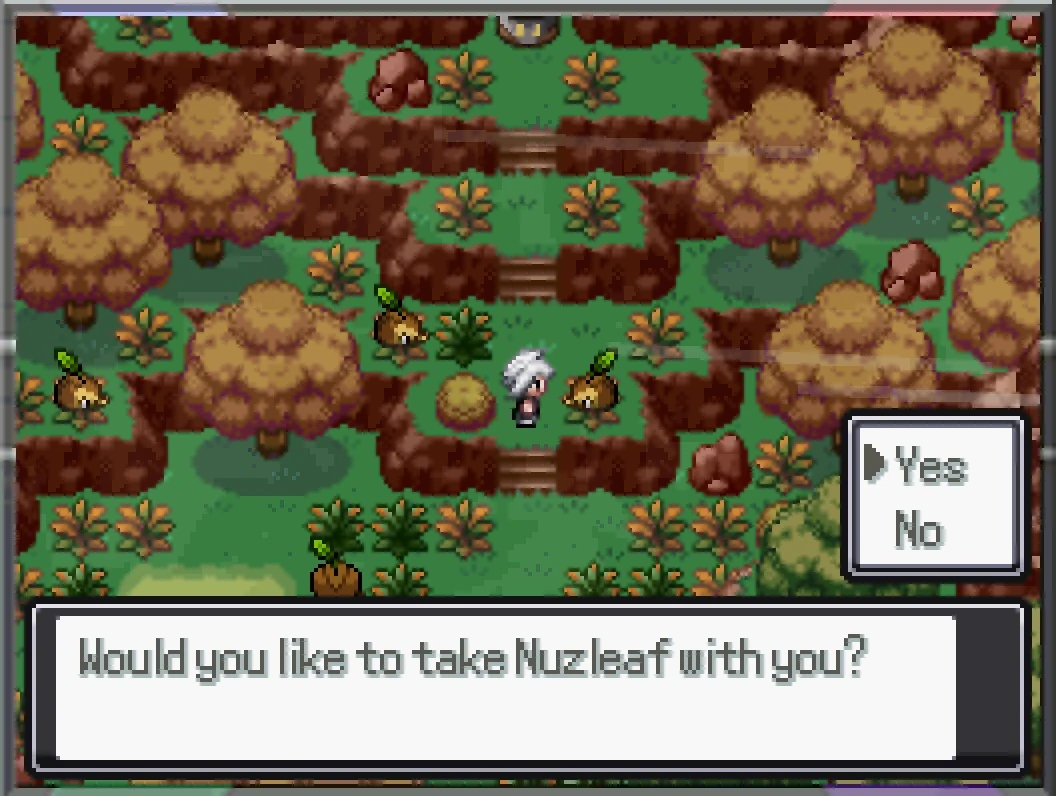
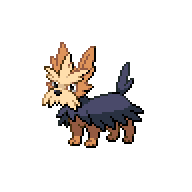
The Rhodochrine Jungle is a large, labyrinthian jungle to the west of the Beryl Ward, untamed by the surrounding Reborn City. The Jungle features very few buildings sprinkled throughout its vast expanse, mostly being taken up by pure forestry. It is home to a wide variety of Pokémon, including some mischievous groups such as Nuzleaf, which have set traps in many locations throughout the Jungle in the hopes of deterring humans from entering and capturing those who do. To the northeast of the Jungle is the massive Rhodochrine Tree, which contributed to the formation of The Underroot, a large cave system found below the Jungle.

Battles here take place on a Forest Field.

Puzzle Guide[]

Stealth Approach[]

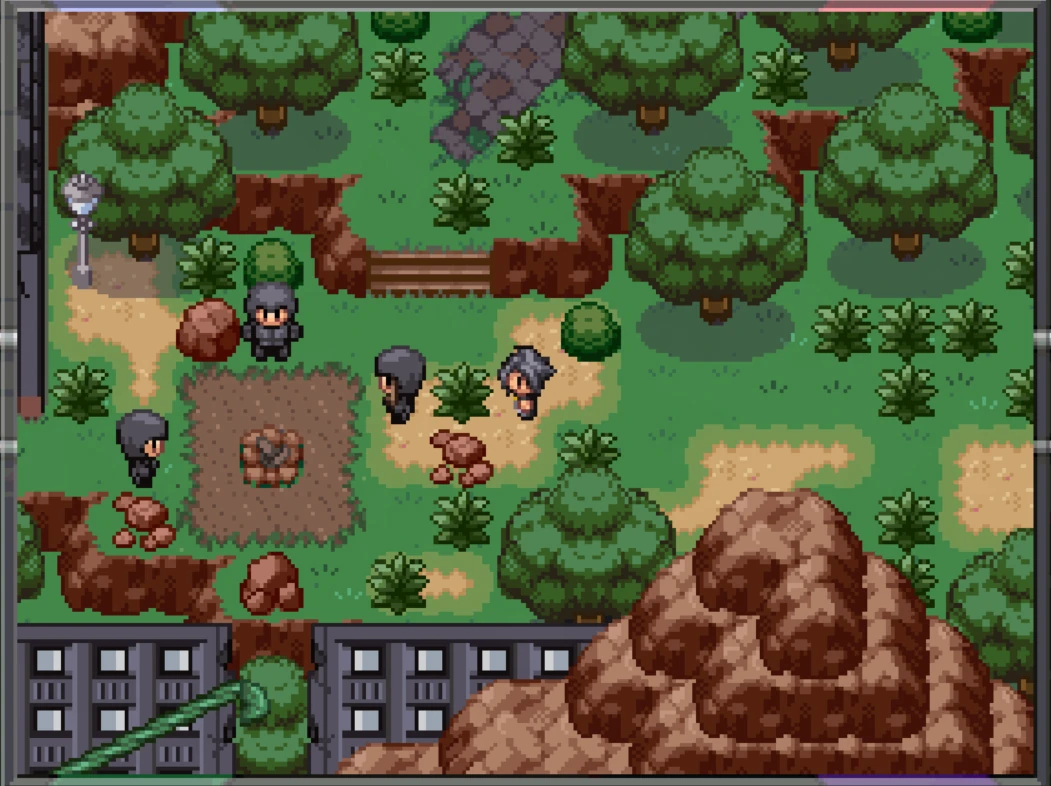
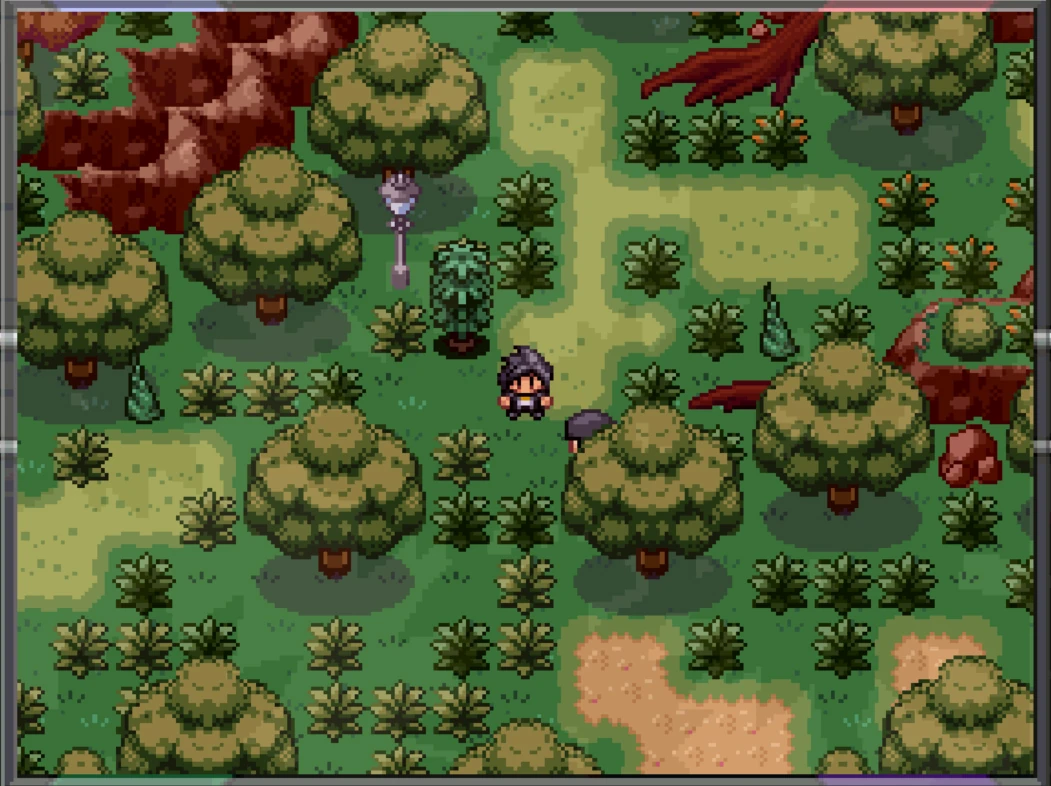
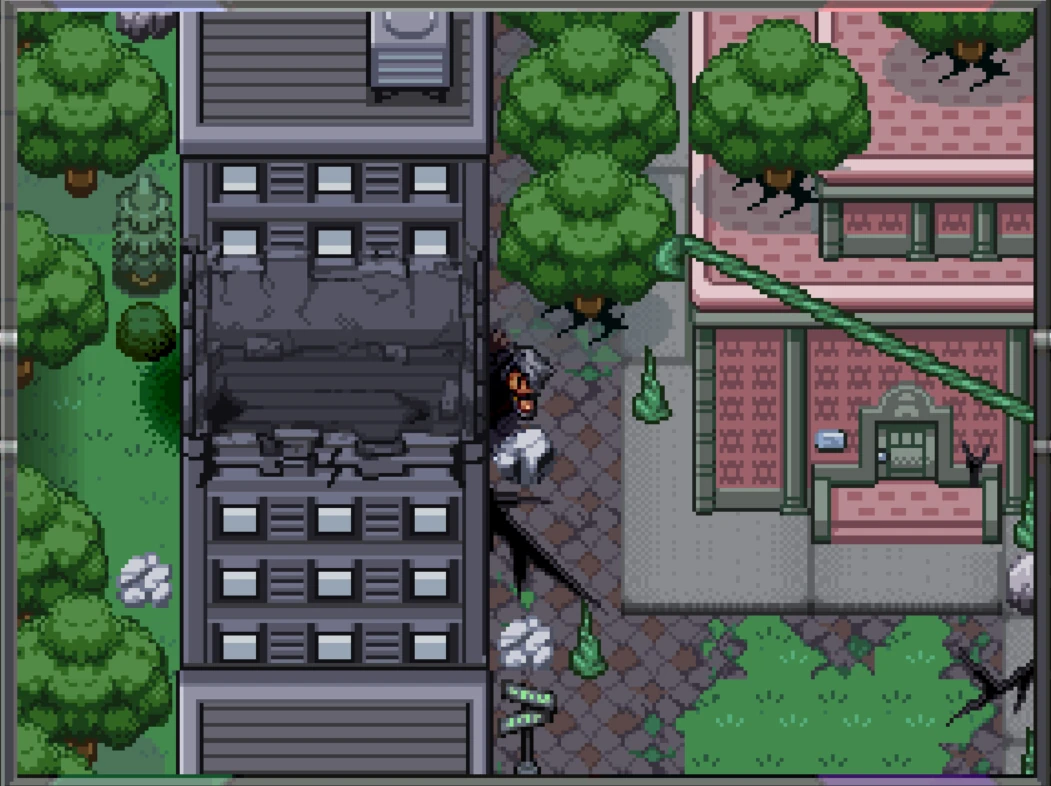
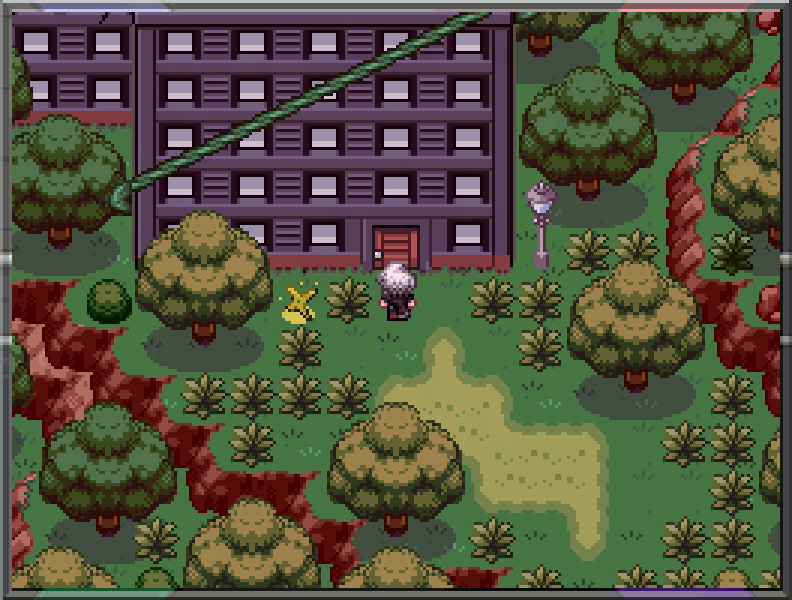
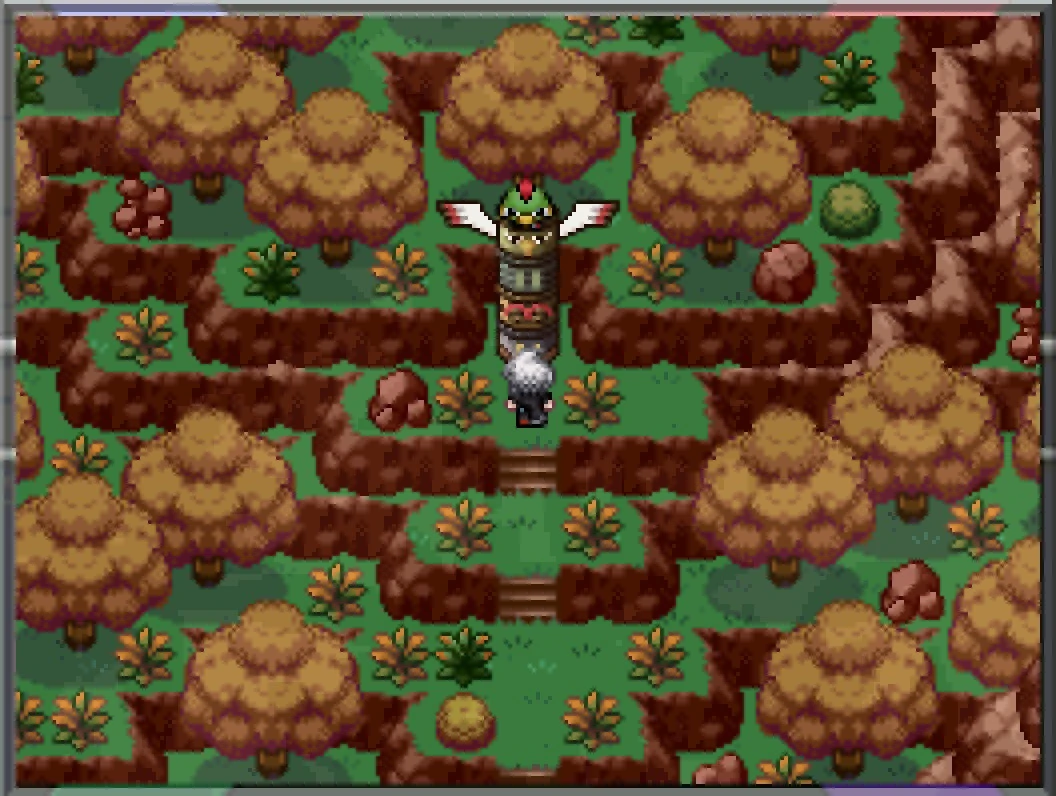
On your first visit to the Rhodochrine Jungle, you will be pursuing Team Meteor. Near the bottom right entrance, there is a group of Meteor Grunts sitting by a campfire. If you are discovered by the Grunts, you will be imprisoned in the leftmost section of the Jungle.

It is possible to avoid capture. The general rule is do not step on any Tall Grass tiles, and do not step on any tile adjacent to any of the Grunts. There are differences in terms of events and Relationship Points between getting captured and not getting captured.

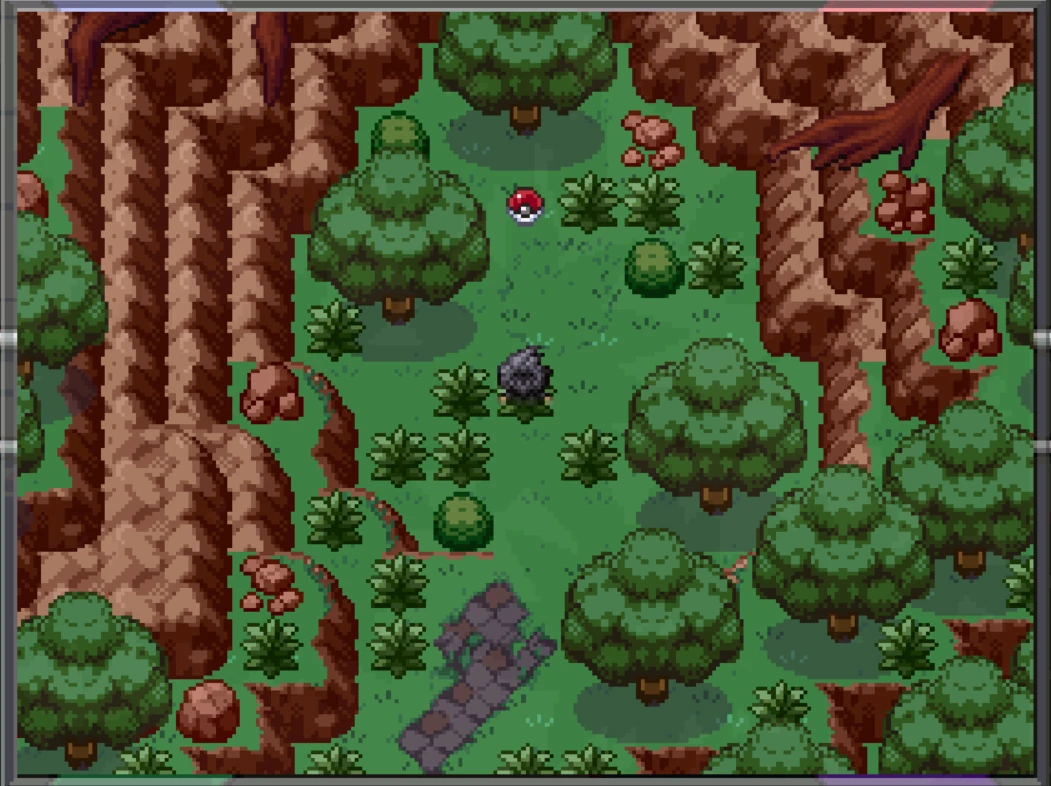
Follow the exact steps below to avoid being captured.

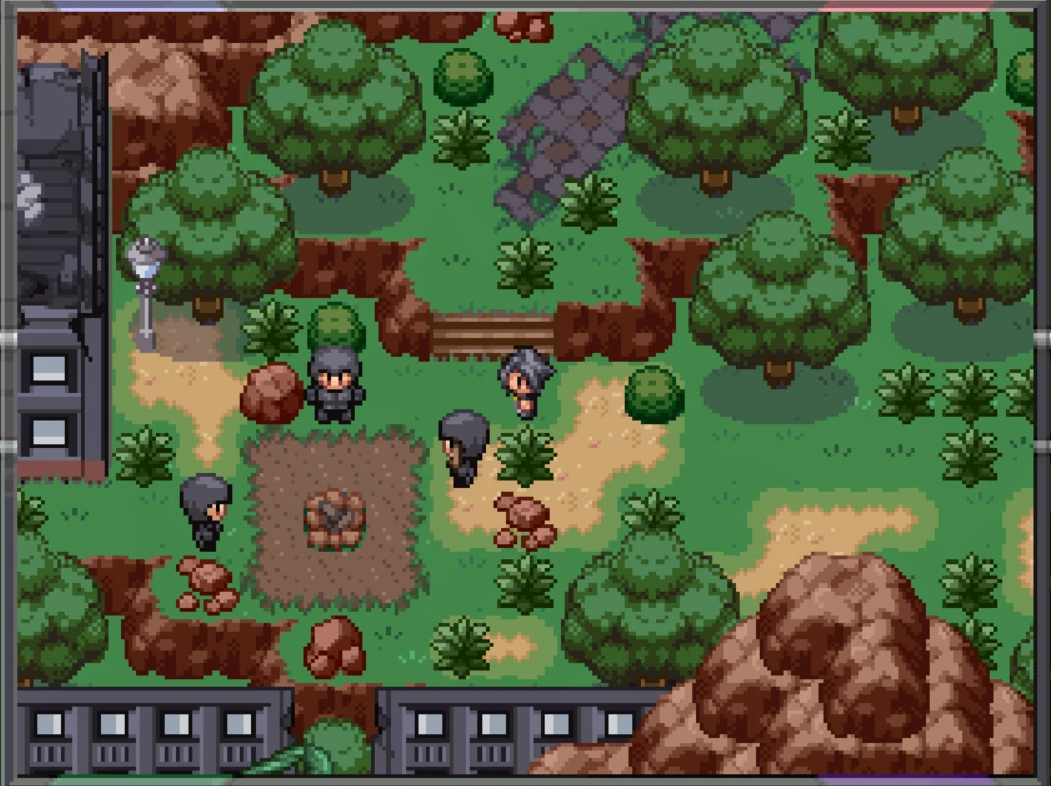
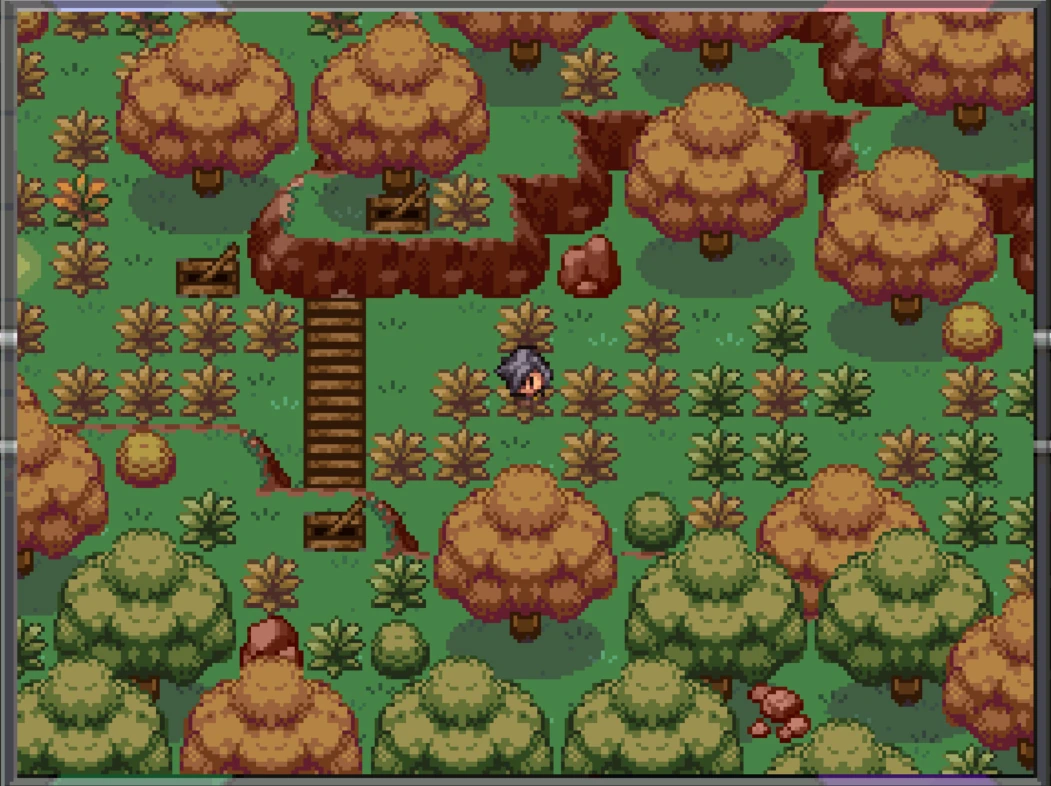
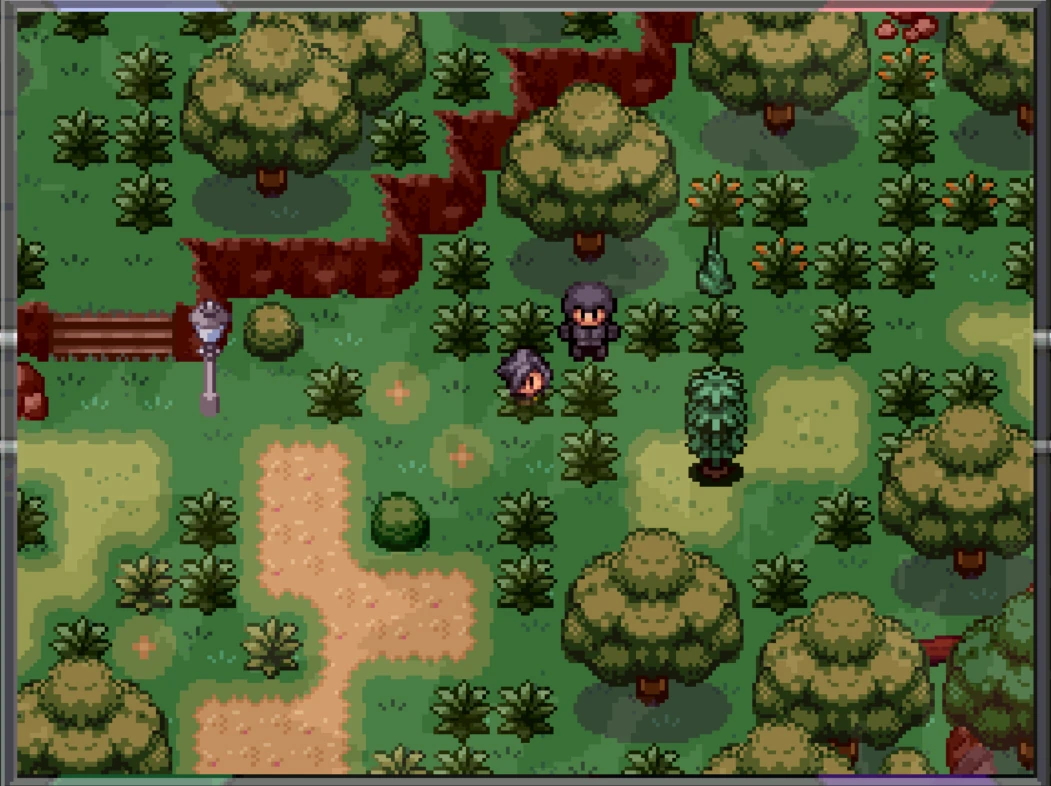
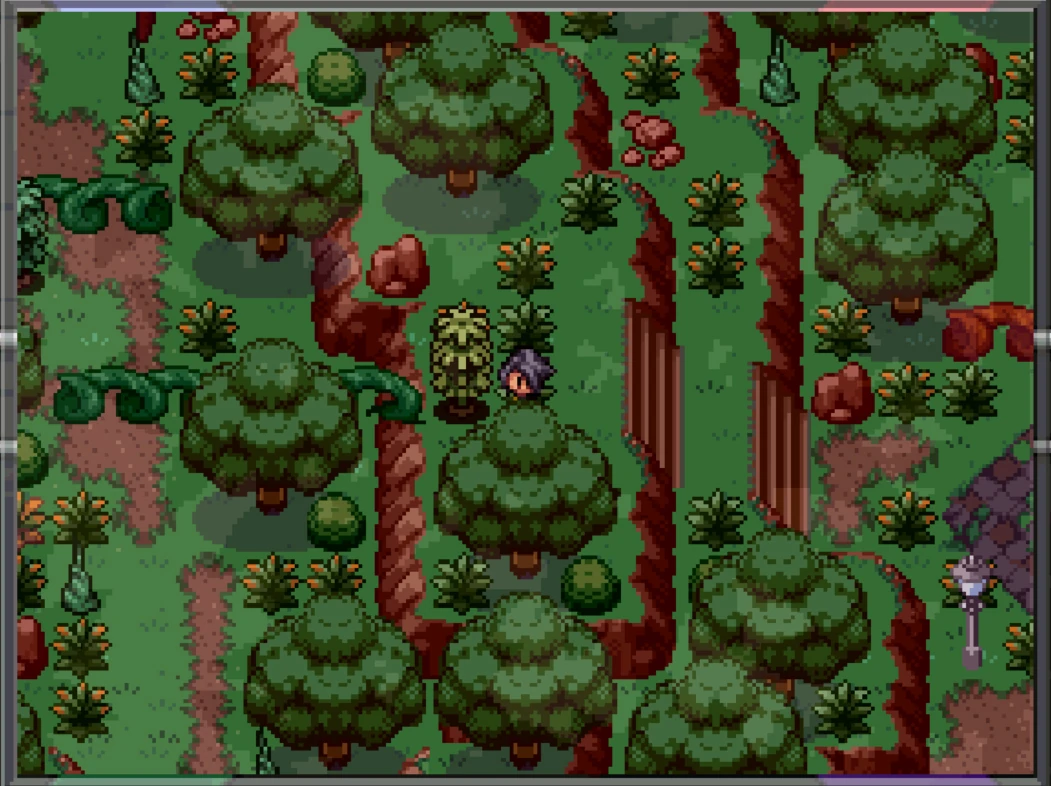
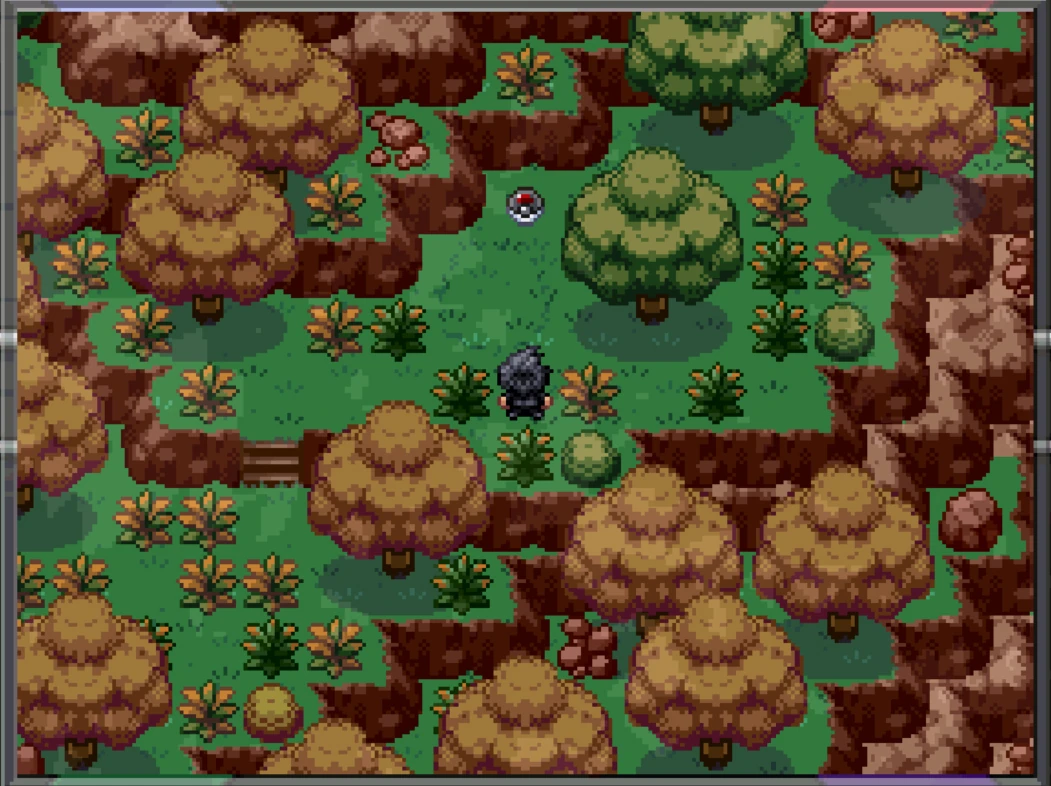
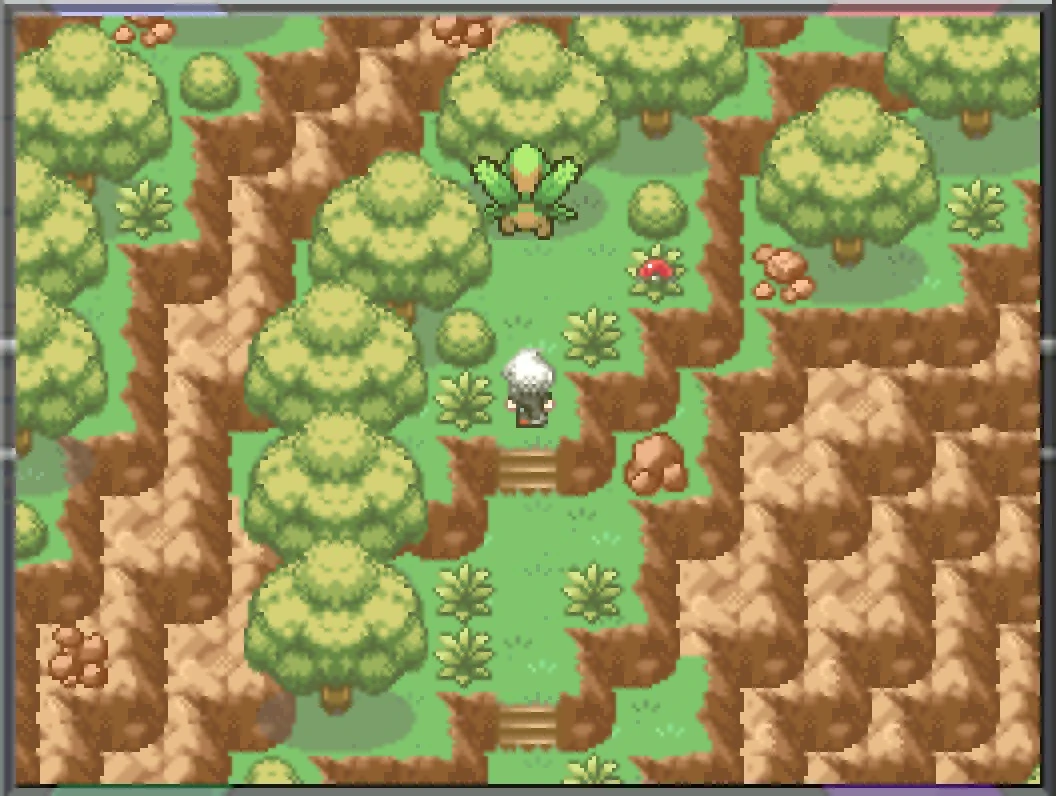
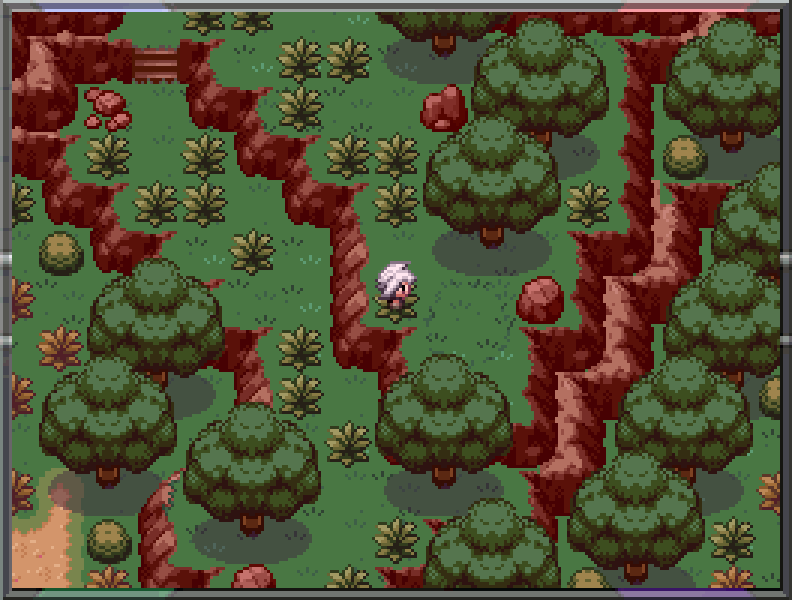
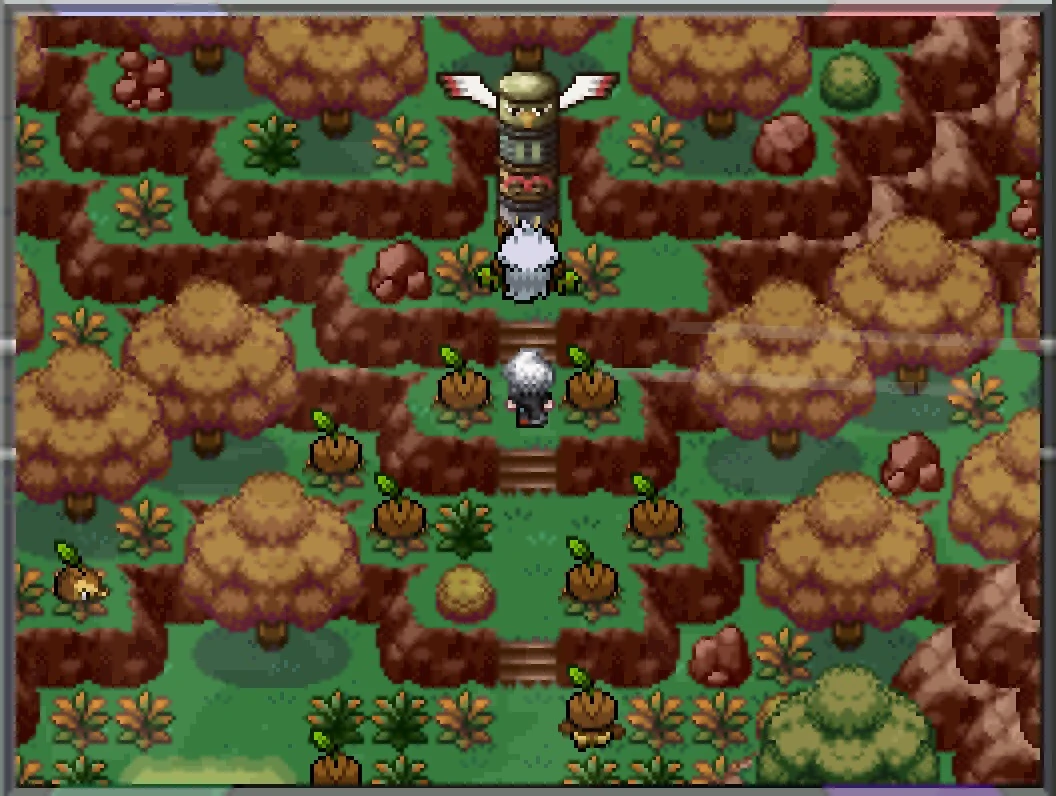
Go to that tile like in the left photo. Go up one tile and go left one tile to reach the tile in the right photo. Do not go left more than one tile.

Rhodochrine Stealth 1Rhodochrine Stealth 2

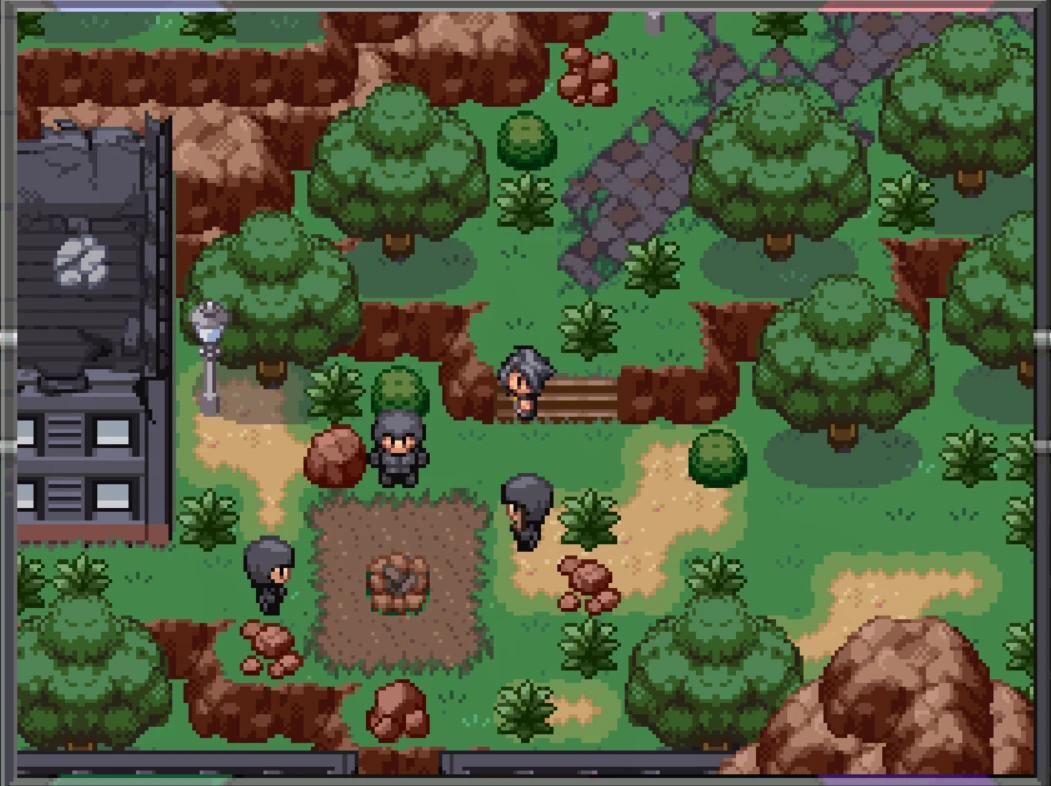
Go up one tile and go left one tile again. Then go up only two tiles to not walk into the bush. Go right one tile and go up one tile.

Rhodochrine Stealth 3Rhodochrine Stealth 4

Escaping Capture[]

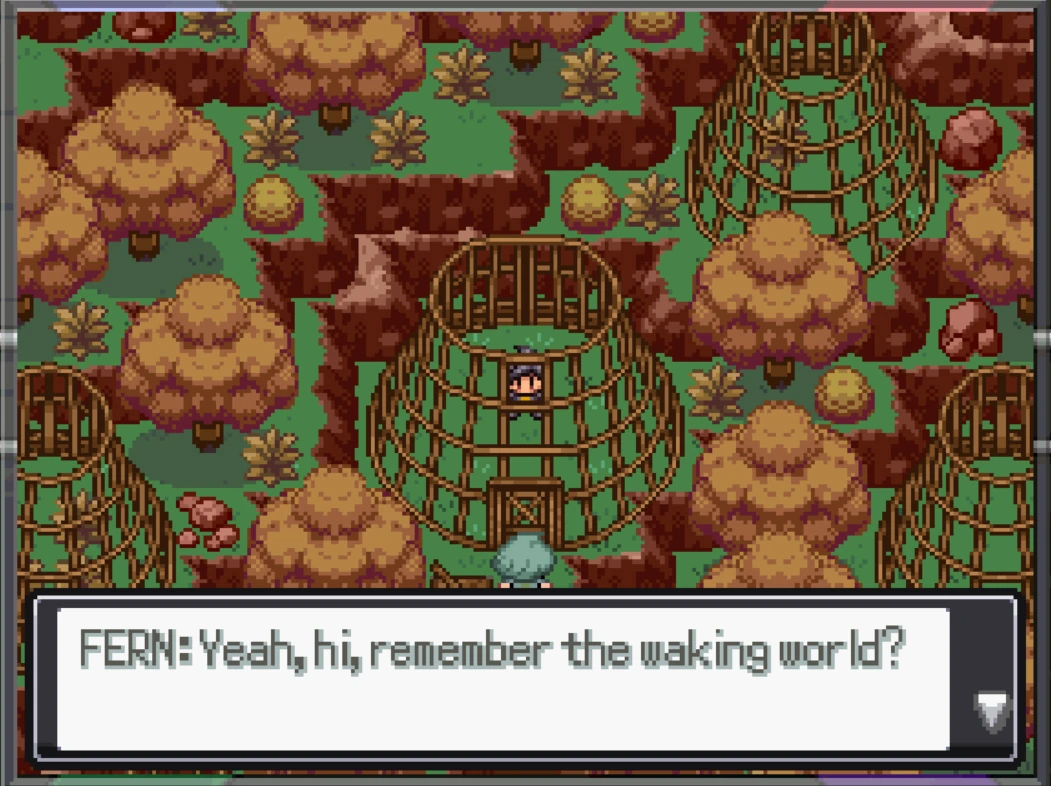
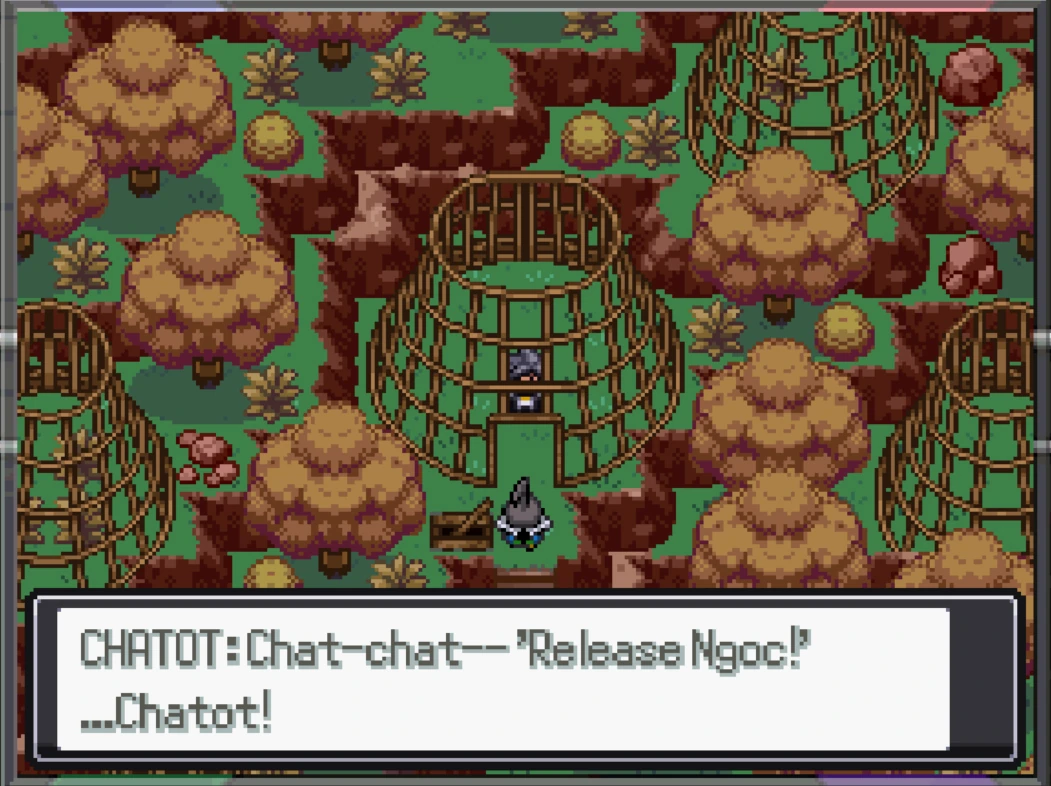
If you are captured by the Nuzleafs or the Team Meteor grunts, Fern will show up outside your cage and offer to free you on the condition that you say humiliating statements he wants you to. If you refuse, wait for a few minutes. A Chatot will show up and free you.

Rhodochrine Capture 1Rhodochrine Capture 2

After you're freed, go to the cage on your right and free Cain. Then go down and work on the switches to get out of the cage area.

Rhodochrine Capture 3Rhodochrine Capture 4

Main Puzzle[]

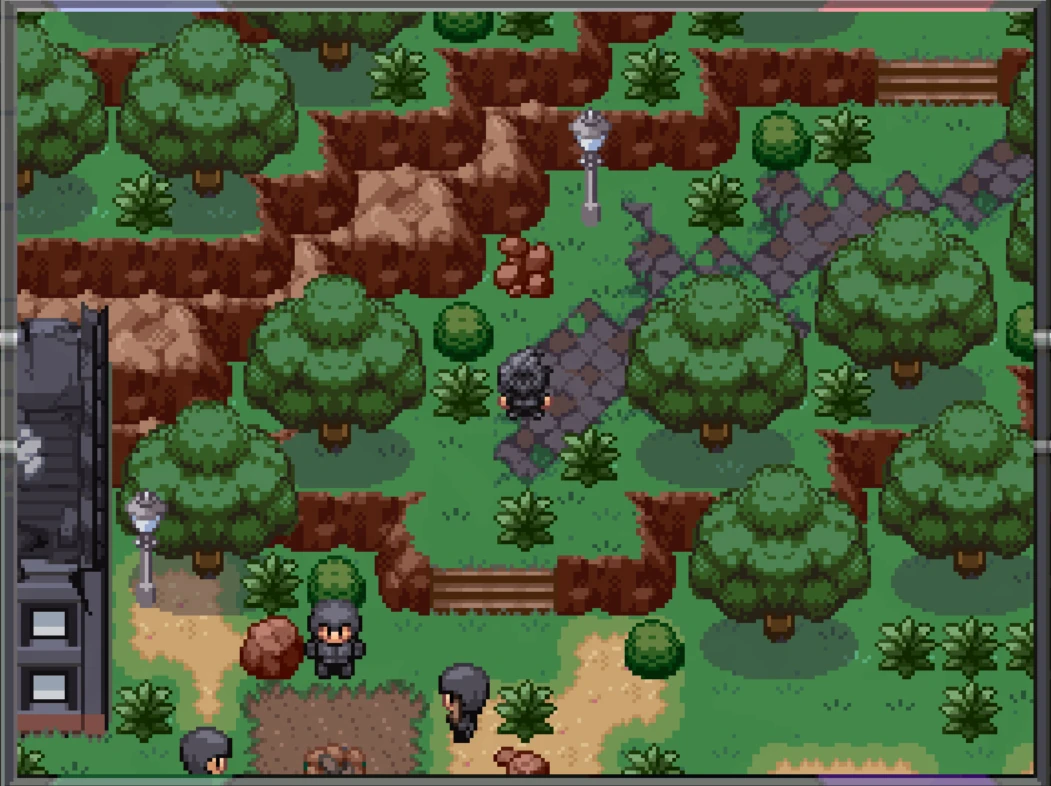
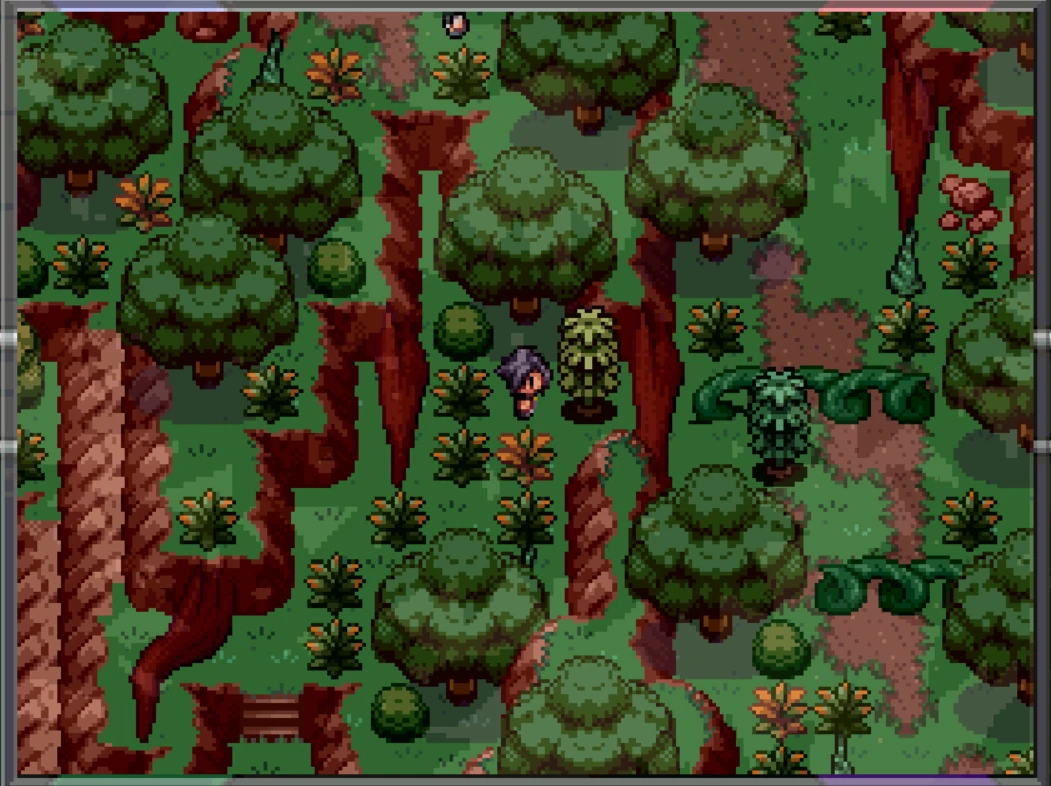
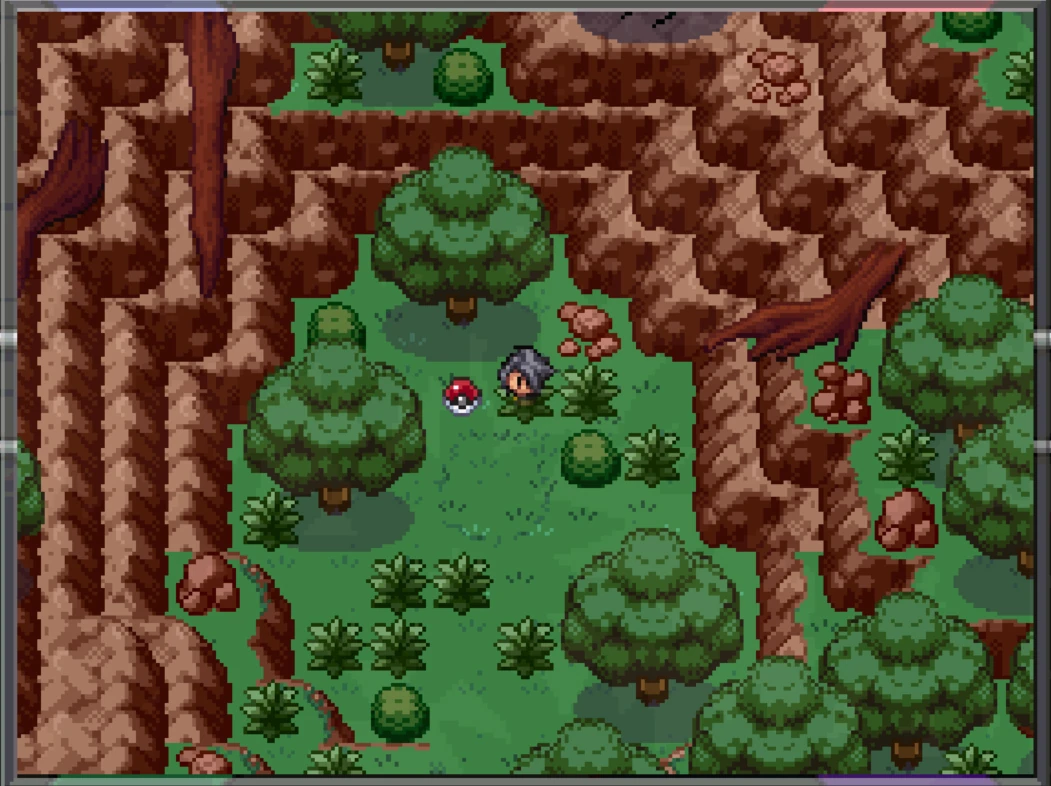
Regardless of whether you are captured or not, you need to proceed with the story. Your goal is to get to the PULSE Machine in front of the big tree in the middle of the top row of the area. The path there is blocked by two vines, so you need to use Cut to get rid of them.

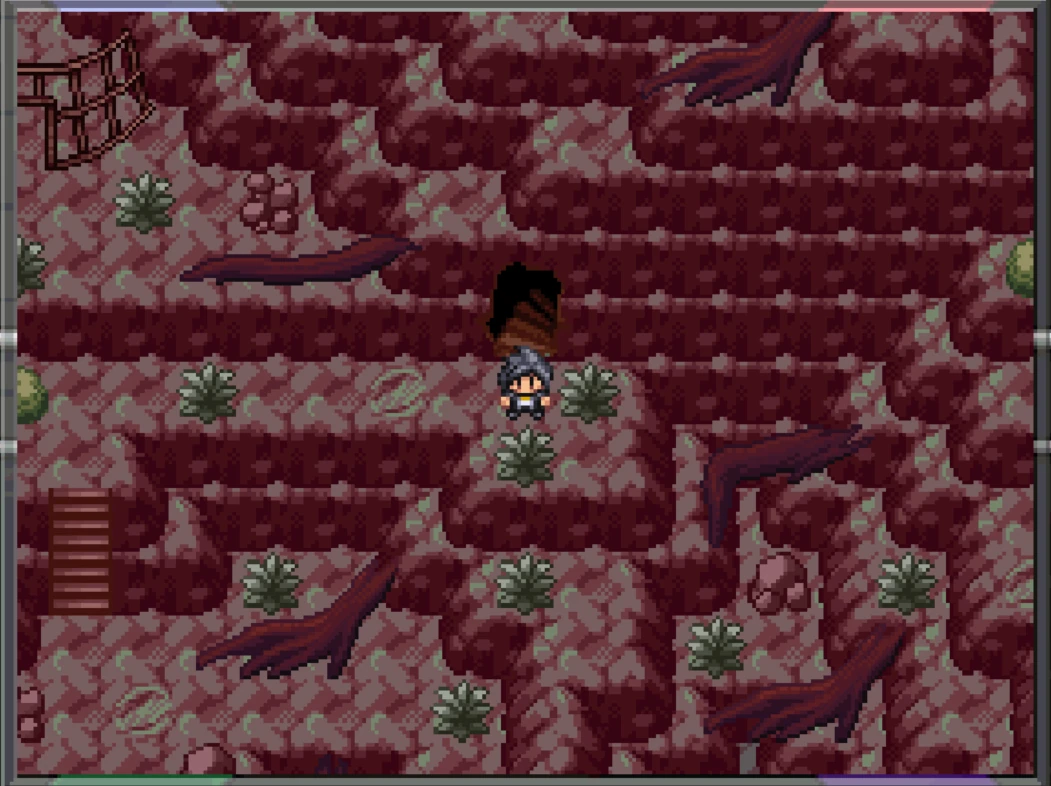
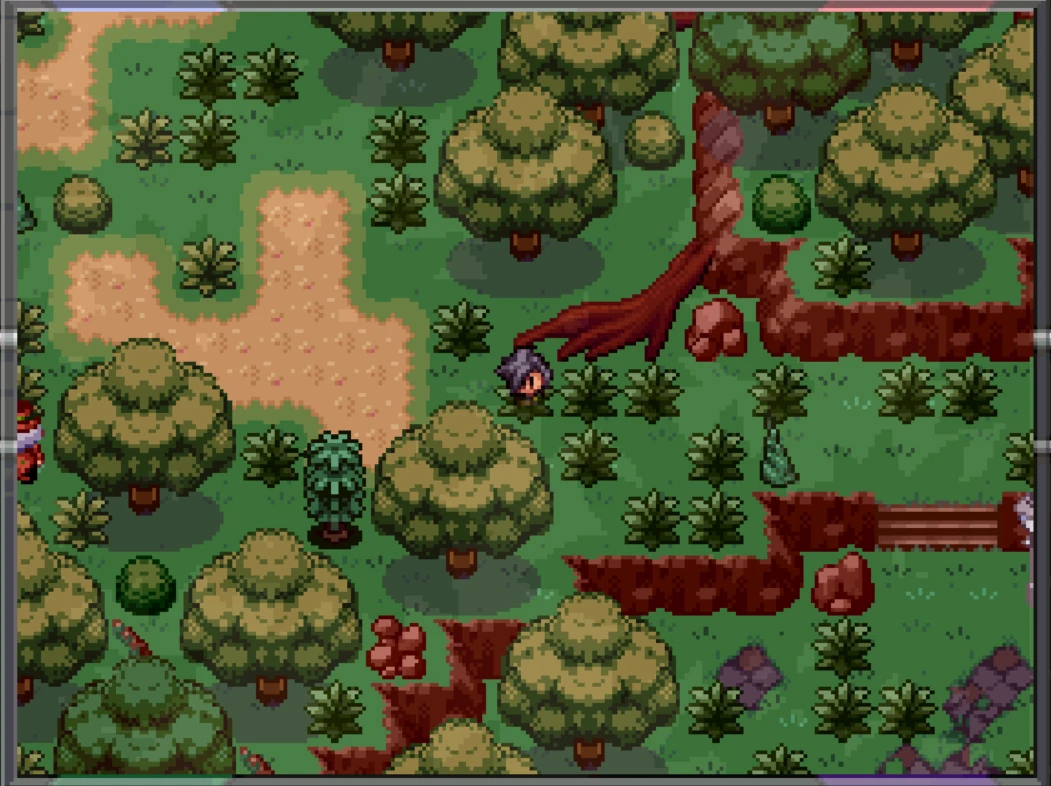
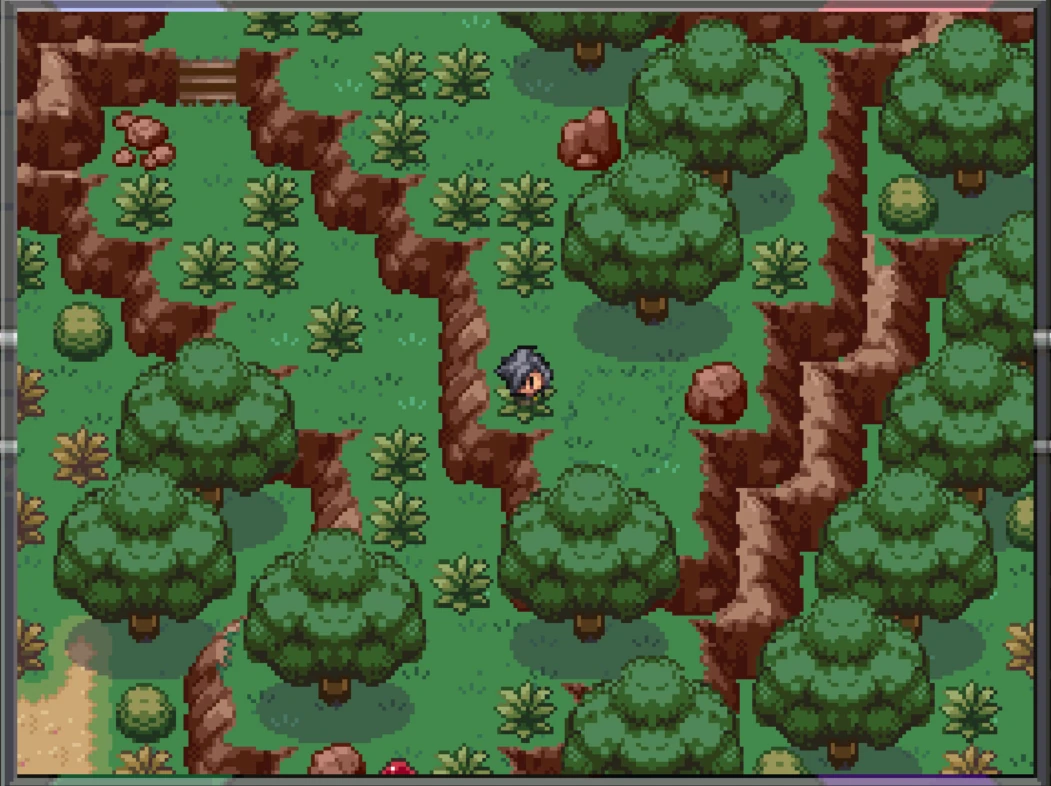
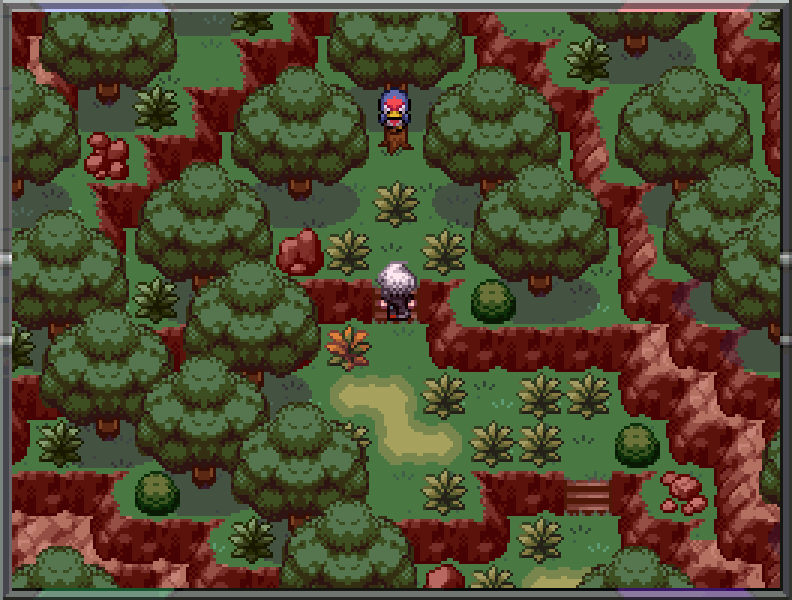
Get to the central area like in the right photo. If you got captured, go straight right after you're freed. If you didn't get captured. go straight up. You can fall into the Underroot and go up.

Rhodochrine Puzzle 1Rhodochrine Puzzle 2

Go down and go right past that grunt. Go up the stairs and cut the tree.

Rhodochrine Puzzle 3Rhodochrine Puzzle 4

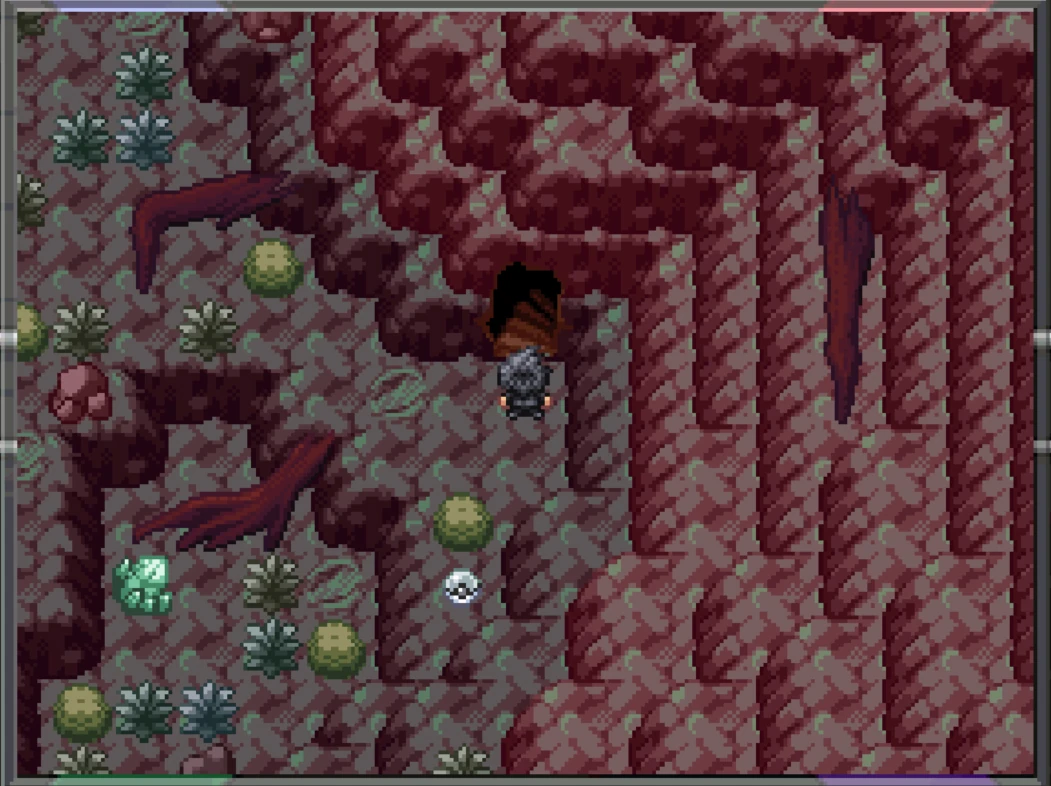
Return to the Underroot. Stick to the right side. Go to that area like in the left photo. Then go all the way right and go up the stairs.

Rhodochrine Puzzle 5Rhodochrine Puzzle 6

Go right and exit the jungle. Cut the tree. Go up and go left through the building and enter the jungle again. Cut the tree.

Rhodochrine Puzzle 7Rhodochrine Puzzle 8

Go back to the central area like in the 2nd photo. This time go down but go down a little bit further. When you see the old man, go right and go through the ladders. Go up straight in the center.

Rhodochrine Puzzle 9Rhodochrine Puzzle 10


Places of Interest[]

Nuzleaf Trap[]

The Nuzleaf traps are 2x2 areas with faint circular marks around them and are quick ways to get to The Underroot. There are three traps in the jungle: the first two are in the bottom right corner and in the top left corner of the whole area, respectively. The third one is in the bottom left corner. In the first visit to the jungle, falling into the first trap will cause the Nuzleafs to imprison the player in a cage in the leftmost side of the jungle.

Rhodochrine Trap 1Rhodochrine Trap 2

Rhodochrine Trap 3

Rhodochrine Tree[]

More Information: Rhodochrine Tree

Located on the northeast edge of the Jungle is the massive Rhodochrine Tree which towers over much of the surrounding area and contributed to the formation of The Underroot.

The Underroot[]

More Information: The Underroot

A large open cave system located below the Rhodochrine Tree, home to its own variety of Pokémon not found on the Jungle's surface. The caves can be used to navigate to otherwise unreachable portions of the Jungle, but the local Nuzleaf tribe also use pitfall traps as a means to drop unsuspecting visitors into their depths.

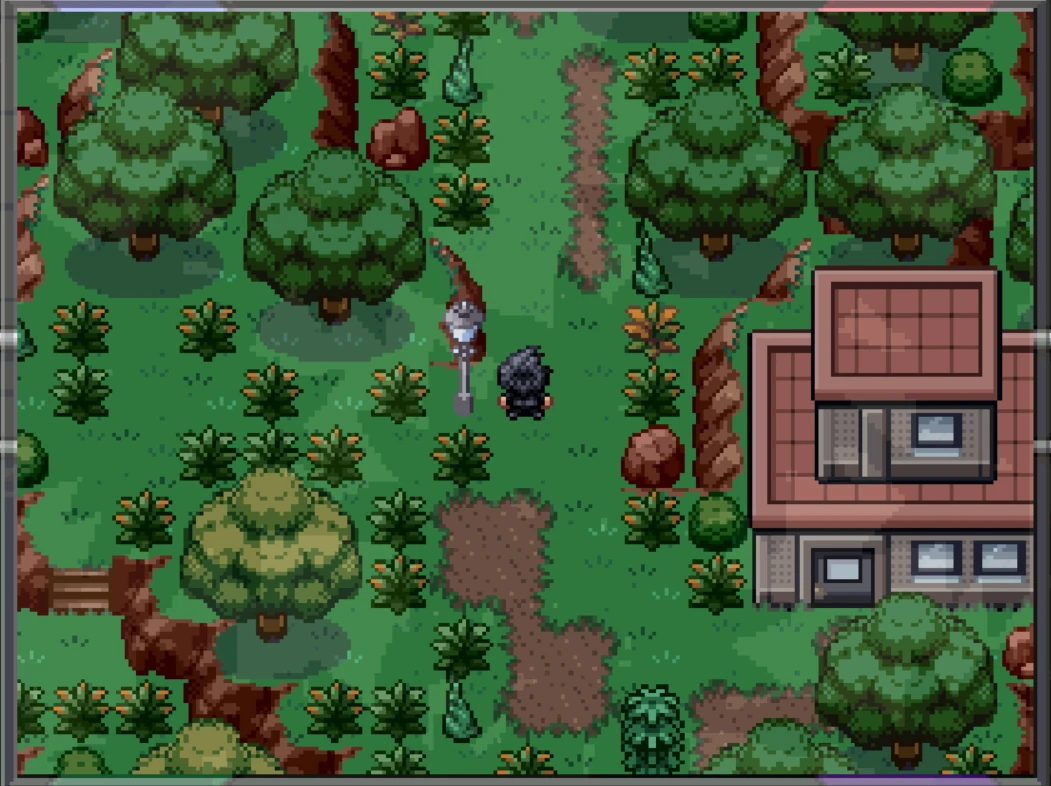
Move Tutor's House[]

Nestled deep within the Jungle in an area only accessible via The Underroot is a woman's house. She expresses her distaste for the City's destructive influence on nature, and demands the player leave her home at once. However, if the player chose a Grass-Type Starter Pokémon, she will act as a Move Tutor for the move Giga Drain, free of charge. Click on the link below for a guide on how to get to her.

More Information: Move Tutor#Rhodochrine Jungle

Ill-Fated Totem[]

More Information: Totem Pole Pokemon Event

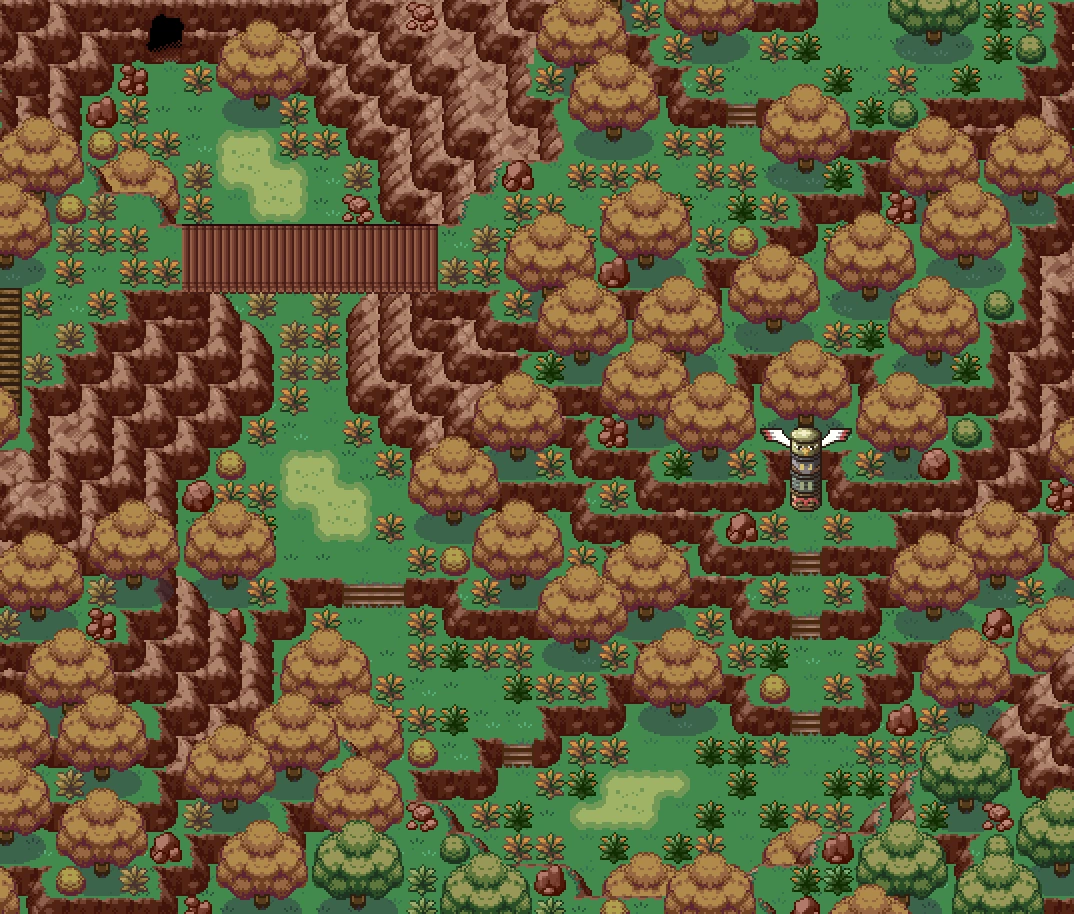
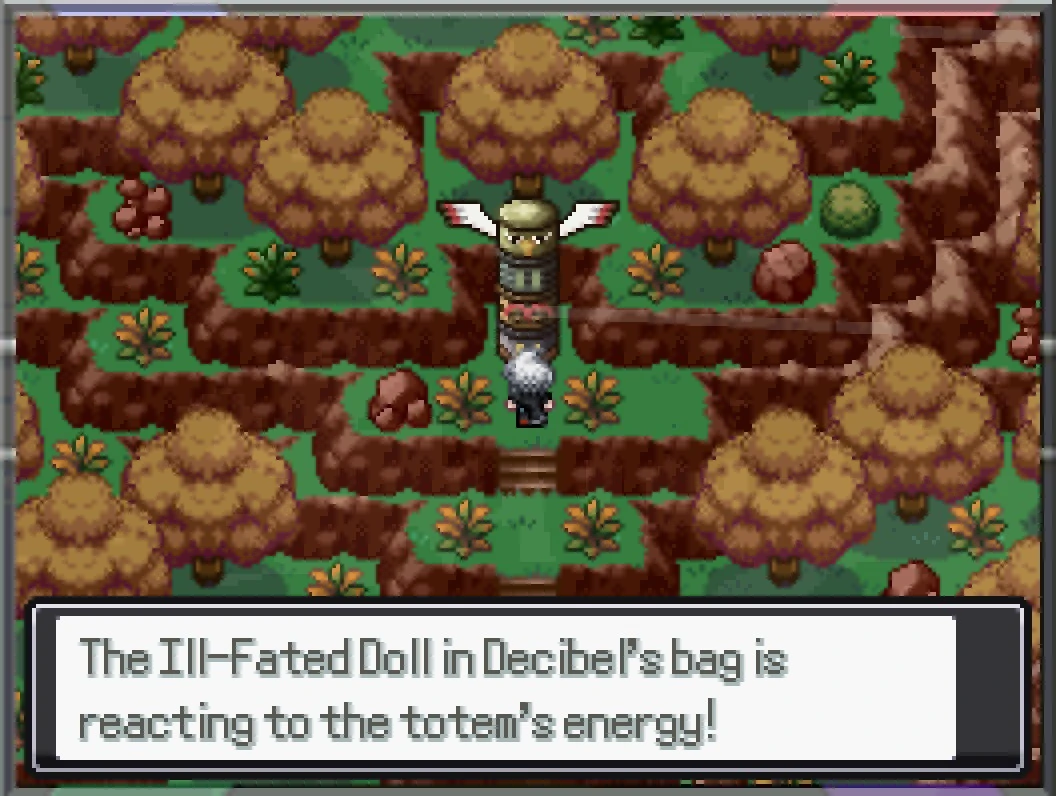
After acquiring Rock Smash, a new entrance into the Jungle is made accessible via Beryl Cave. In this isolated area is a Totem Pole depicting the Pokémon Elgyem, Golett, Baltoy and Natu. If the player brings an Ill-Fated Doll to the Totem, one of the first three Pokémon will be encountered, depending on which was previously encountered. If the Totem Pole is interacted with on a clear day while no Doll is on hand, a Natu will appear instead.

Pokémon[]

  Pokémon     Location     Levels     Rate  
Morning Icon Day Icon Night Icon
Grass
021 Spearow
Grass Grass
21-24 12% 0% 0%
021 Spearow
Grass Grass
21-23 0% 20% 0%
046 Paras
Grass Grass
21-24 0% 0% 27%
044 Gloom
Grass Grass
21-23 0% 12% 10%
083 Farfetch'd
Grass Grass
22-30 2% 7% 0%
083 Farfetch'd
Grass Grass
22-26 0% 0% 4%
084 Doduo
Grass Grass
21-23 0% 5% 0%
163 Hoothoot
Grass Grass
22-24 0% 0% 20%
114 Tangela
Grass Grass
22-24 0% 6% 0%
114 Tangela
Grass Grass
22-28 0% 0% 9%
165 Ledyba
Grass Grass
21-24 9% 0% 0%
166 Ledian
Grass Grass
20-23 20% 0% 0%
167 Spinarak
Grass Grass
22-24 0% 0% 10%
168 Ariados
Grass Grass
22-24 0% 0% 15%
417 Pachirisu
Grass Grass
22-24 5% 0% 0%
417 Pachirisu
Grass Grass
21-23 0% 5% 5%
511 Pansage
Grass Grass
21-23 5% 15% 0%
540 Sewaddle
Grass Grass
22-24 25% 10% 0%
664 Scatterbug
Grass Grass
22-24 12% 10% 0%
702 Dedenne
Grass Grass
21-23 10% 10% 0%
Event Pokémon
357 Tropius
Event Event
36 One
234 Stantler
Event Event
25 One
276 Taillow
Event Event
12 One
274 Nuzleaf
Event Event
20, 23, 26, 27, 30 Five
177 Natu
Event Event
16*, 20* One
343 Baltoy
Event Event
27 Infinite
605 Elgyem
Event Event
27 Infinite
622 Golett
Event Event
27 Infinite
439 Mime Jr.
Sunkern Trade
Sunkern
Same as traded Pokémon One (1/4)
615 Cryogonal
Sunkern Trade
Sunkern
Same as traded Pokémon One (1/4)
676 Furfrou
Sunkern Trade
Sunkern
Same as traded Pokémon One (1/4)
703 Carbink
Sunkern Trade
Sunkern
Same as traded Pokémon One (1/4)


Sidequests and Special Encounters[]

The Disappearing Item[]

Near the entrance in the bottom right corner of the map is an item that the player can get in their first visit to the jungle. However, if the player goes straight to that item, they will fall into a trap laid by the Nuzleafs, which can be detected through the faint circular marks. If the player falls into the trap, the item will disappear. To get the item, the player simply needs to go right, up, and then left (counterclockwise) around the trap. The item is a Rare Candy.

Rhodochrine Trap 1Rhodochrine Rare Candy

Police Officers Sidequest[]

More Information: Police Officers Sidequest

A police officer can be found in the jungle.

Rhodochrine Trade Event[]

More Information: Rhodochrine Trade Event

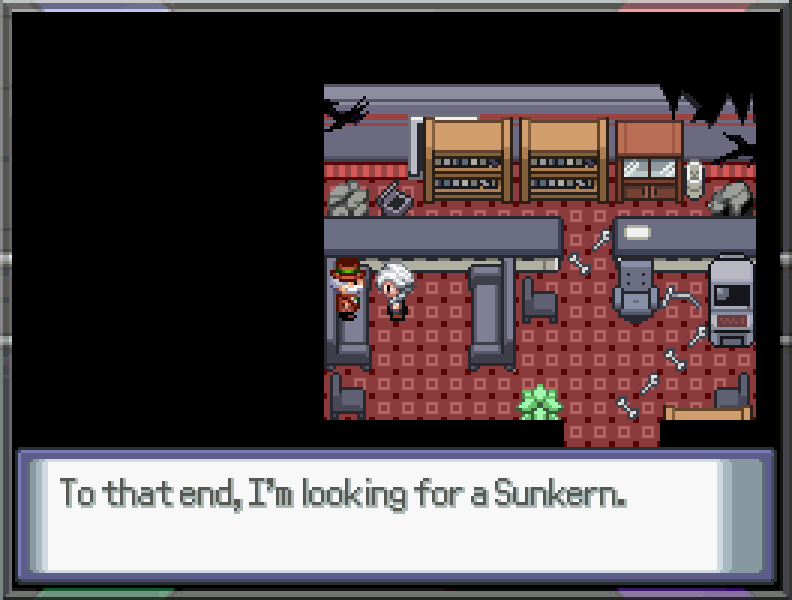
There is a Gentleman in an apartment complex who offers to trade one of his prized Pokémon in exchange for a Sunkern. The Pokémon given is random and can be Carbink, Cryogonal, Mime Jr. or Furfrou. The Pokemon you will get is already determined from the start of the game, and resetting won't change it. All of the Pokémon hold an Exp. Share. Some of the Pokémon will have Egg Moves:

  • Mime Jr. has one of these Egg Moves in its moveset: Confuse Ray, Icy Wind, Psychic Terrain, or Nasty Plot.
  • Furfrou has the Egg Move Refresh in its moveset.
  • Cryogonal doesn't have any Egg Move in its moveset.
  • Carbink doesn't have any Egg Move in its moveset.

Rhodocrine Jungle Trade locationRhodocrine Jungle Trade person

Stantler Special Encounter[]

More Information: Stantler Special Encounter

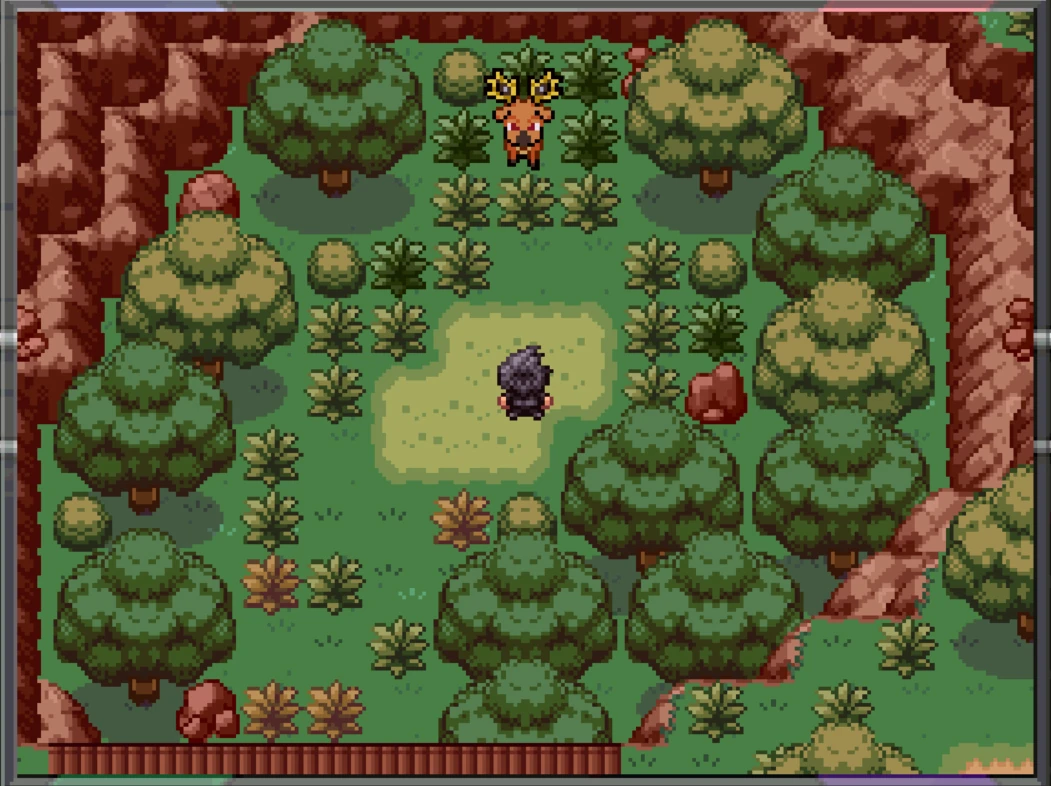
In the section of the Jungle with the Move Tutor's House, accessible via the Underroot, there is a dead-end section to the north. Approaching the clearing will cause a Stantler to appear and jump down from the cliffs above. Interacting with it will prompt a battle. Stantler has two Egg Moves in its moveset: Megahorn and Disable.

Stantler 2

Tropius Special Encounter[]

More Information: Tropius Special Encounter

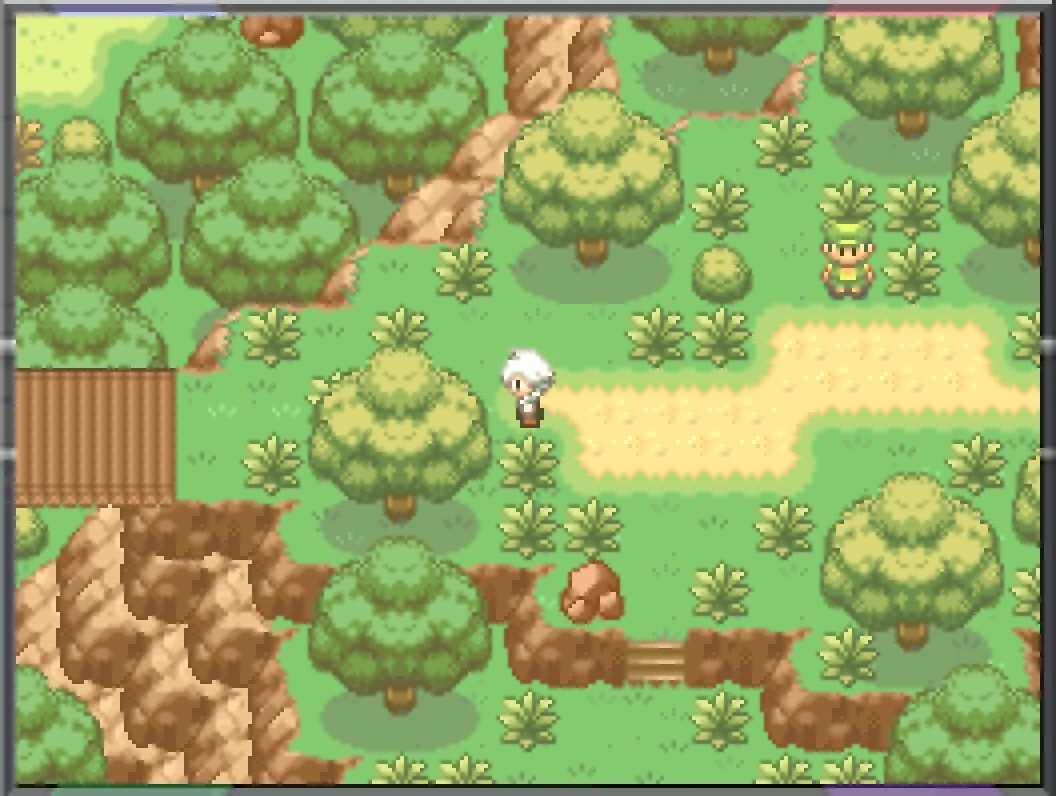
During sunny weather, Tropius can be found across the bridge overlooking the Stantler Encounter. This bridge can be accessed by proceeding west from the Gentleman's house. If the player interacts with Tropius, It will challenge them to a battle. Tropius has one of these Egg Moves in its moveset: Leech Seed, Leaf Blade, or Dragon Dance.

Tropius 1Tropius 2

Taillow Special Encounter[]

More Information: Taillow Special Encounter

South of the bridge leading towards the Tropius Encounter is a pitfall trap that leads into an otherwise inaccessible portion of the Underroot. Heading back topside through this portion, an isolated area with a tree stump can be discovered. Approaching the stump will prompt a Taillow to fly down and await the player's challenge. Taillow doesn't have any Egg Move in its moveset.

Taillow Pit TrapTaillow Stump

Totem Pole Pokemon Event[]

More Information: Totem Pole Pokemon Event

If you have the Ill-fated Doll and interact with the Totem located here, an Elgyem, Golett or Baltoy will jump out and initiate a battle. This process can be repeated assuming more Ill-Fated Dolls are on hand, with the Pokémon that appears cycling through the three listed encounters. If you have no Ill-fated Doll and there is a clear weather, interacting with Totem will cause a Natu to appear instead. Only Elgyem will have Egg Moves, which is either Nasty Plot or Cosmic Power.

Totem Pole 1Natu

Nuzleaf Special Encounter[]

More Information: Nuzleaf Special Encounter

During windy weather, a group of Nuzleaf and Shiftry will appear in the Totem Area. Defeat the tribe, and the player will be able to catch some of the Nuzleaf. They will have either Leech Seed, Grassy Terrain or Foul Play as Egg Moves.

Nuzleaf 1Nuzleaf 2

Items[]

Item Location
Exp. Candy XS Exp. Candy XS Brown Rock near Southeast Entrance (Hidden)
Rare Candy Rare Candy To the north of the entrance, behind the Southeast Pitfall Trap
Rawst Berry Rawst Berry Brown Rocks near Southeast Pitfall Trap, next to Rare Candy (Hidden)
Guard Spec. Guard Spec. Bush left of the bonfire where the Meteor Grunts were (Hidden)
Full Heal Full Heal Brown Rocks on the stairs going up to the healer's house (Hidden)
Exp. Candy S Exp. Candy S Mossy Rock below first set of vines, up from healer's house (Hidden)
Blue Shard Blue Shard Brown Rock above Meteor Grunt near Gentleman's house (Hidden)
EXP Share Exp. Share Guide
Red Shard Red Shard Behind a tree West of Gentlemen's House (Hidden)
Telluric Seed Telluric Seed South of knocked over building
Super Potion Super Potion Brown Rocks West of Telluric Seed (Hidden)
Calcium Calcium Behind Ranger, east of Tropius Bridge (Hidden)
Exp. Candy M Exp. Candy M At the end of the bridge, left of the Ranger. Next to Tropius event
Purple Shard Purple Shard Rock two stairs south of the Ranger (Hidden)
Great Ball Great Ball End of the path, south of the Ranger
Liechi Berry Liechi Berry Brown Rocks next to Gentleman Trainer (Hidden)
Great Ball Great Ball SNorth of Meteor Grunt across from Gentleman (Hidden)
X Speed X Speed Brown Rock south of Underroot Entrance in the middle of the forest, up the stairs from Gentleman (Hidden)
Antidote Antidote Brown Rock left of Rhodochrine Tree (Hidden)
Dark Gem Dark Gem Mossy Rock left of fallen building on the way to the cages (Hidden)
TM77 Psych Up TM77 Psych Up Guide
Green Shard Green Shard Brown Rocks north of knocked over building (Hidden)
Salac Berry Salac Berry Mossy Rock south of upper left cage (Hidden)
Antidote Antidote Mossy Rock East of Salac Berry (Hidden)
Paralyze Heal Paralyze Heal Yellow mossy rock south of the upper right cage (Hidden)
Blue Shard Blue Shard Across bridge left of cages (Hidden)
Pulse Dex PULSE Read-out 05A Guide
Red Shard Red Shard Patch of Brown Grass below Taillow (Hidden)
Exp. Candy S Exp. Candy S Brown Rock below Taillow (Hidden)
Ether Ether Brown Rock below Stantler, accessible from west entrance of The Underroot (Hidden)
Exp. Candy S Exp. Candy S Mossy Rock below Amaria's first location (Hidden)
Burn Heal Burn Heal Brown Rocks west of Amaria's first location (Hidden)
Red Shard Red Shard Brown Rocks right before Ace Battle (Hidden)
Petaya Berry Petaya Berry Brown Rock right of Rhodochrine Tree (Hidden)
Ultra Ball Ultra Ball Brown Rock next to Beryl Cave entrance, after getting the 4th badge (Hidden)
Bug Gem Bug Gem Brown Rock south of Ultra Ball, after getting the 4th badge (Hidden)
Big Mushroom Big Mushroom Brown Rock south of Totem Pole, after getting the 4th badge (Hidden)
TM05 Roar TM05 Roar Guide
Dread Plate Dread Plate Inside the upper left cage, after getting the 13th badge

Battles[]

Regular Trainers[]

Trainer Pokémon
Meteor Grunt M
Meteor Grunt Kenneth
Reward: Pokémon Dollar240
499 Pignite/ Lv.24
No item
Meteor Grunt M
Meteor Grunt Coleman
Reward: Pokémon Dollar240
532 Timburr/ Lv.22
No item
762 Steenee/ Lv.24
No item
Gentleman
Gentleman Ben
Reward: Pokémon Dollar520
371 Bagon/ Lv.25
No item
446 Munchlax/ Lv.26
No item
Meteor Grunt F
Meteor Grunt Mary
Reward: Pokémon Dollar230
747 Mareanie/ Lv.23
No item
525 Boldore/ Lv.23
No item
Ranger M
Ranger Endow
Reward: Pokémon Dollar338
520 Tranquill/ Lv.25
No item
002 Ivysaur/ Lv.26
No item
Meteor Grunt M
Meteor Grunt Bruno
Reward: Pokémon Dollar230
058 Growlithe/ Lv.22
No item
507 Herdier/ Lv.23
No item


Meteor Manager Ace[]

Ace is battled on a Forest Field in a Single Battle format.

Ace of Clubs
Meteor Manager
Ace of Clubs
Rhodochrine Jungle
BallfullBallfullBallfullBallfullBallfullBallempty
Zorua
Type
Dark Unknown
Ability:
Illusion
Nature:
Serious
Held item:
Bag Telluric Seed Sprite Telluric Seed
Zorua Lv.25
Pursuit
Dark Physical
  --  
   
Grass Knot
Grass Special
  --  
   
Feint Attack
Dark Physical
  --  
   
Taunt
Dark Status
  --  
   
HP Atk Def SpA SpD Spe IVs
37 37 37 37 37 37 20
Baltoy
Types:
Ground Psychic
Ability:
Levitate
Nature:
Serious
Held item:
None
Baltoy Lv.26
Psybeam
Psychic Special
  --  
   
Rock Tomb
Rock Physical
  --  
   
Mud-Slap
Ground Special
  --  
   
Grass Knot
Grass Special
  --  
   
HP Atk Def SpA SpD Spe IVs
39 39 39 39 39 39 20
Roselia
Types:
Grass Poison
Ability:
Leaf Guard
Nature:
Serious
Held item:
Bag Enigma Berry Sprite Enigma Berry
Roselia Lv.26
Giga Drain
Grass Special
  --  
   
Extrasensory
Psychic Special
  --  
   
Natural Gift
Normal Physical
  --  
   
Leech Seed
Grass Status
  --  
   
HP Atk Def SpA SpD Spe IVs
39 39 39 39 39 39 15
Braixen
Type
Fire Unknown
Ability:
Magician
Nature:
Serious
Held item:
Bag Sitrus Berry Sprite Sitrus Berry
Braixen Lv.28
Psybeam
Psychic Special
  --  
   
Fire Spin
Fire Special
  --  
   
Hypnosis
Psychic Status
  --  
   
Flame Charge
Fire Physical
  --  
   
HP Atk Def SpA SpD Spe IVs
42 42 42 42 42 42 20
Tangrowth
Types:
Grass Rock
Ability:
Stamina
Nature:
Serious
Held item:
Bag Pecha Berry Sprite Pecha Berry
Tangrowth Lv.29
Growth
Normal Status
  --  
   
Mega Drain
Grass Special
  --  
   
Stored Power
Psychic Special
  --  
   
Rock Tomb
Rock Physical
  --  
   
HP Atk Def SpA SpD Spe IVs
43 43 43 43 43 43 7


Pokemon Tribe (Optional)[]

Pokemon Tribe is battled on a Forest Field in a Single Battle format.

Tribe
Pokemon
Tribe
Rhodochrine Jungle
BallfullBallfullBallfullBallfullBallfullBallfull
Nuzleaf
Types:
Grass Dark
Ability:
Early Bird
Nature:
Hardy
Held item:
None
Nuzleaf Lv.20
Growth
Normal Status
  --  
   
Fake Out
Normal Physical
  --  
   
Nature Power
Normal Status
  --  
   
Razor Wind
Normal Special
  --  
   
HP Atk Def SpA SpD Spe IVs
30 30 30 30 30 30 10
Nuzleaf
Types:
Grass Dark
Ability:
Chlorophyll
Nature:
Hardy
Held item:
None
Nuzleaf Lv.25
Fake Out
Normal Physical
  --  
   
Nature Power
Normal Status
  --  
   
Razor Wind
Normal Special
  --  
   
Feint Attack
Dark Physical
  --  
   
HP Atk Def SpA SpD Spe IVs
37 37 37 37 37 37 10
Nuzleaf
Types:
Grass Dark
Ability:
Chlorophyll
Nature:
Hardy
Held item:
None
Nuzleaf Lv.25
Fake Out
Normal Physical
  --  
   
Nature Power
Normal Status
  --  
   
Razor Wind
Normal Special
  --  
   
Feint Attack
Dark Physical
  --  
   
HP Atk Def SpA SpD Spe IVs
37 37 37 37 37 37 10
Nuzleaf
Types:
Grass Dark
Ability:
Pickpocket
Nature:
Hardy
Held item:
None
Nuzleaf Lv.30
Nature Power
Normal Status
  --  
   
Razor Wind
Normal Special
  --  
   
Feint Attack
Dark Physical
  --  
   
Leaf Blade
Grass Physical
  --  
   
HP Atk Def SpA SpD Spe IVs
45 45 45 45 45 45 10
Nuzleaf
Types:
Grass Dark
Ability:
Pickpocket
Nature:
Hardy
Held item:
None
Nuzleaf Lv.30
Nature Power
Normal Status
  --  
   
Razor Wind
Normal Special
  --  
   
Feint Attack
Dark Physical
  --  
   
Leaf Blade
Grass Physical
  --  
   
HP Atk Def SpA SpD Spe IVs
45 45 45 45 45 45 10
Shiftry
Types:
Grass Dark
Ability:
Chlorophyll
Nature:
Hardy
Held item:
None
Shiftry Lv.55
Nasty Plot
Dark Status
  --  
   
Leaf Tornado
Grass Special
  --  
   
Hurricane
Flying Special
  --  
   
Leaf Storm
Grass Special
  --  
   
HP Atk Def SpA SpD Spe IVs
82 82 82 82 82 82 10


Trivia[]

  • Rhodochrine Jungle is named after rhodochrosite, a banded pink carbonate mineral.


Locations
Towns and Cities Reborn CitySpinel TownAgate CityCalcenon CityAmetrine CityLabradorra City
Gyms Peridot GymOnyx Trainers' SchoolLapis GymYureyu Power PlantWasteland HideoutVoclain EstateTanzan CoveVanhanen CastleIolia ValleyBig TopCalcenon GymGlitch WorldCoral GymNever AfterFiore ArenaAgate ArenaLabradorra Gym
Routes Route 1Route 2Route 3Route 4
Reborn City Opal WardLower Peridot WardPeridot WardObsidia WardSouth Obsidia WardCoral WardOnyx WardJasper WardBeryl WardNorth Obsidia WardLapis Ward

Grand HallLower Peridot AlleyNorth Peridot AlleyMosswater IndustrialUnderground RailnetObsidia AlleywayObsidia SlumsObsidia Department StoreOnyx ArcadeMalchous Forest ParkRhodochrine JungleThe UnderrootBeryl LibraryBeryl BridgeGrand StairwayBeryl CaveNorth Obsidia AlleywayLapis AlleywayDr. Connal's OrphanageBlacksteam FactoryYureyu HQCitae Astrae7th StreetSubseven SanctumDevon CorpDevon Corp?Water Treatment CenterBlacksteam ShelterGrand Hall SEEKRIT RoomReborn Underground Train System
Aventurine Region Abandoned Power PlantRoute 1South Aventurine WoodsNorth Aventurine WoodsVanhanen LabyrinthVanhanen CastleIolia ValleyAgate CityAgate CircusRoute 2Fiore MansionCelestinine Cascade
Apophyll Beach Apophyll BeachApophyll AcademyApophyll CavePyrous MountainAzurine IslandAzurine LakeAzurine Cave
Byxbysion Wasteland Byxbysion WastelandWasteland HideoutByxbysion GrottoWasteland Wall
Chrysolia Region Tanzan MountainTanzan DepthsTanzan CoveBelrose ManseChrysolia ForestChrysolia SpringSpinel TownSpinel MuseumLost RailcaveTanzan Meteor BaseWasteland Wall
Carnelia Region Citrine MountainCelestinine MountainAmetrine MountainAmetrine CityCalcenon CityLabradorra CityLabradorra ArenaRoute 3Route 4LCCCGlass WorkstationThe VoidVictory RoadCharous PathCharous MountainCharous Hall
Tourmaline Desert Tourmaline DesertSugiline CaveTeknite CaveTeknite RidgeMirage Tower1R253 Scrapyard
Postgame Areas NightclubChrysolia DeepwoodsManyworld PoolManyworld ForestVacant PastBattle WheelAegir CaveTwilight DesertTwilight FactoryNot Truly For ChildrenTabula RasaAegir DepthsAmetrine CoreUnexplored TerritorySplash GroundsStalemateEndgameNeo Blacksteam FabricationIdyll of PestilenceIdyll of PanaceanceTriskeline ToyboxCauldron of the FutureNew World CrashRhodochrine TreeNew World HelixMirage Tower?Distorted SpaceCitae PrismaNeoteric IsleNew World AsylumAnother Time
New World Areas New World (Citae Astrae)New World (Vanhanen Castle)New World (Route 2)New World (Route 1)New World (North Aventurine Woods)New World (South Aventurine Woods)New World (Route 3)New World (Route 4)New World (Chrysolia Deepwoods)New World (Lost Railcave)New World (Victory Road)New World (Hoopa Quest)New World (Sugiline Ruin)
Advertisement